OH the excitement when the 2019 Quilter’s Planner arrived and I opened the beautiful box!! The anticipation of its arrival was intense. Not just because I have a quilt featured in the companion magazine, but, because I want 2019 to be better than 2018…and 2018 has been sooooooo good!
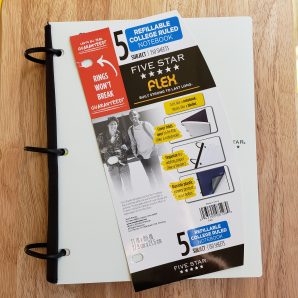
I ordered the unbound version just to experiment with adding pages and extras to my planning pages. I searched for a binder to accommodate the size of the planner and found the Five Star Flex. It is a bit smaller than a regular 3 ring binder so it didn’t bulk up my planner more than I wanted a binder to. The 3 rings are a perfect match for the unbound planner which arrives pre-punched for a standard 3 ring binder. The rings on the planner are flexible and I haven’t decided if they are a positive or negative yet.

The front and back cover of the flex notebook didn’t quite cover the planner tabs. I purchased some inexpensive chipboard and punched holes in it to create a more rigid cover and back . The more rigid cover now extends out over my planner edge to protect the tabs.
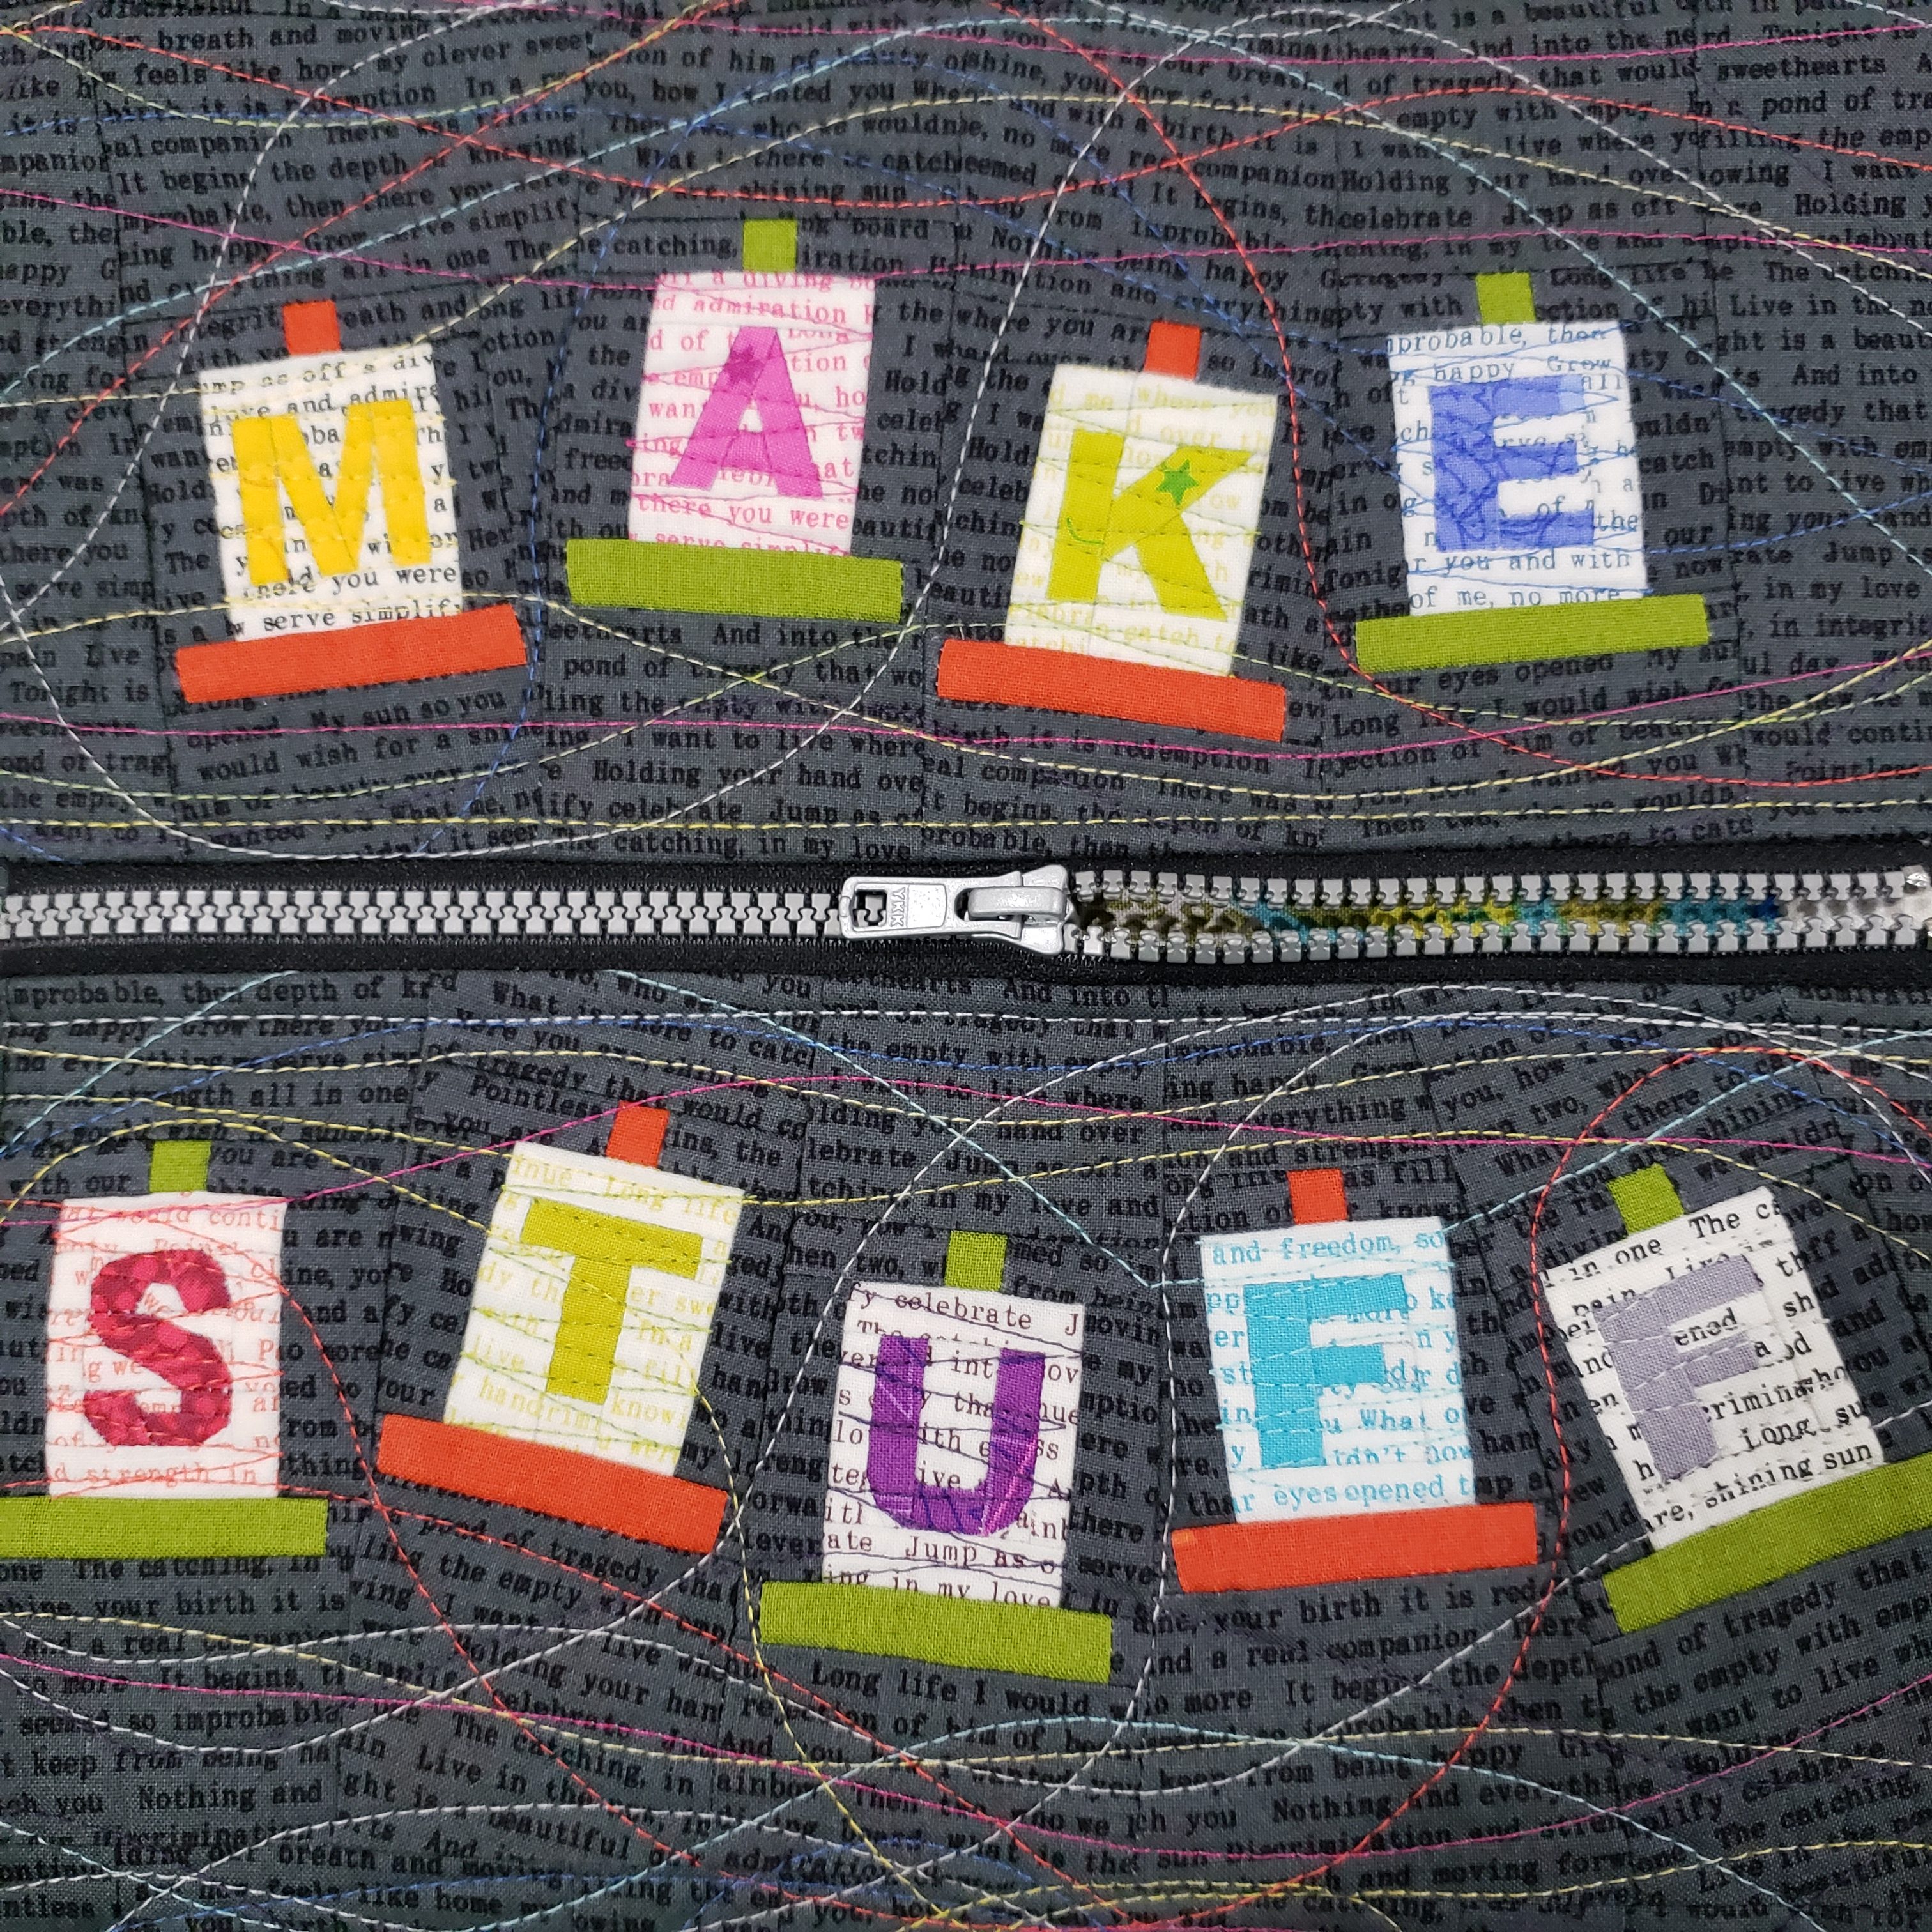
I knew I wanted to create a quilted Sketchbook Jacket for my planner. I always put a jacket on my sketchbooks and planners…it keeps all the papers in and I have a way to zip it up and take it with me. The Sketchbook Jacket PDF pattern is available on Payhip or in my Etsy Shop.
I was racking my brain for a month trying to come up with a mantra like cover design for my planner and remembered the fun Alphabet Spools pattern I had purchased from Quiet Play last year. Those spools with the little alphabet letters were just waiting for me to work them into a project! I love the little letters and how they sit perfectly in the spools…but I needed my spools to look more like my thread rack….

As you can see, I use Aurifil Thread. The 50 & 40 wt. are my go-to threads for quilting, bag making, and all kinds of sewing. And I needed the spools to be small enough to fit within the 11 inch cover of the jacket for the planner.
 Foundation paper piecing is probably my favorite quilting technique. The detail you can get and the ability to scale the pattern gives me so much flexibility when designing a layout. I reduced the Alphabet Spools pattern to 40% and created a new top & bottom for the green and orange to match my thread rack selection.
 I created a mini spool block without letters to fill in the blank space between my lettered spools. This is a simple piecing pattern and I was able to vary the width of some of the blocks to show fuller and emptier spools…all in my favorite colors of course.
The final ‘mash up’ of my Sketchbook Jacket & Alphabet Spools will be the perfect mantra cover for my Quilter’s Planner to keep me in the making mood for 2019. What are you planning for 2019 to keep on track with your goals?