Posted on Leave a comment

Planning for 2020

This year has been a bit off course from what I imagined.  I have not completed the projects & goals I had for the year.  A new year is around the corner and life is settling down a bit here so it is the perfect time to step back and try this plan again….and maybe add some new ideas!

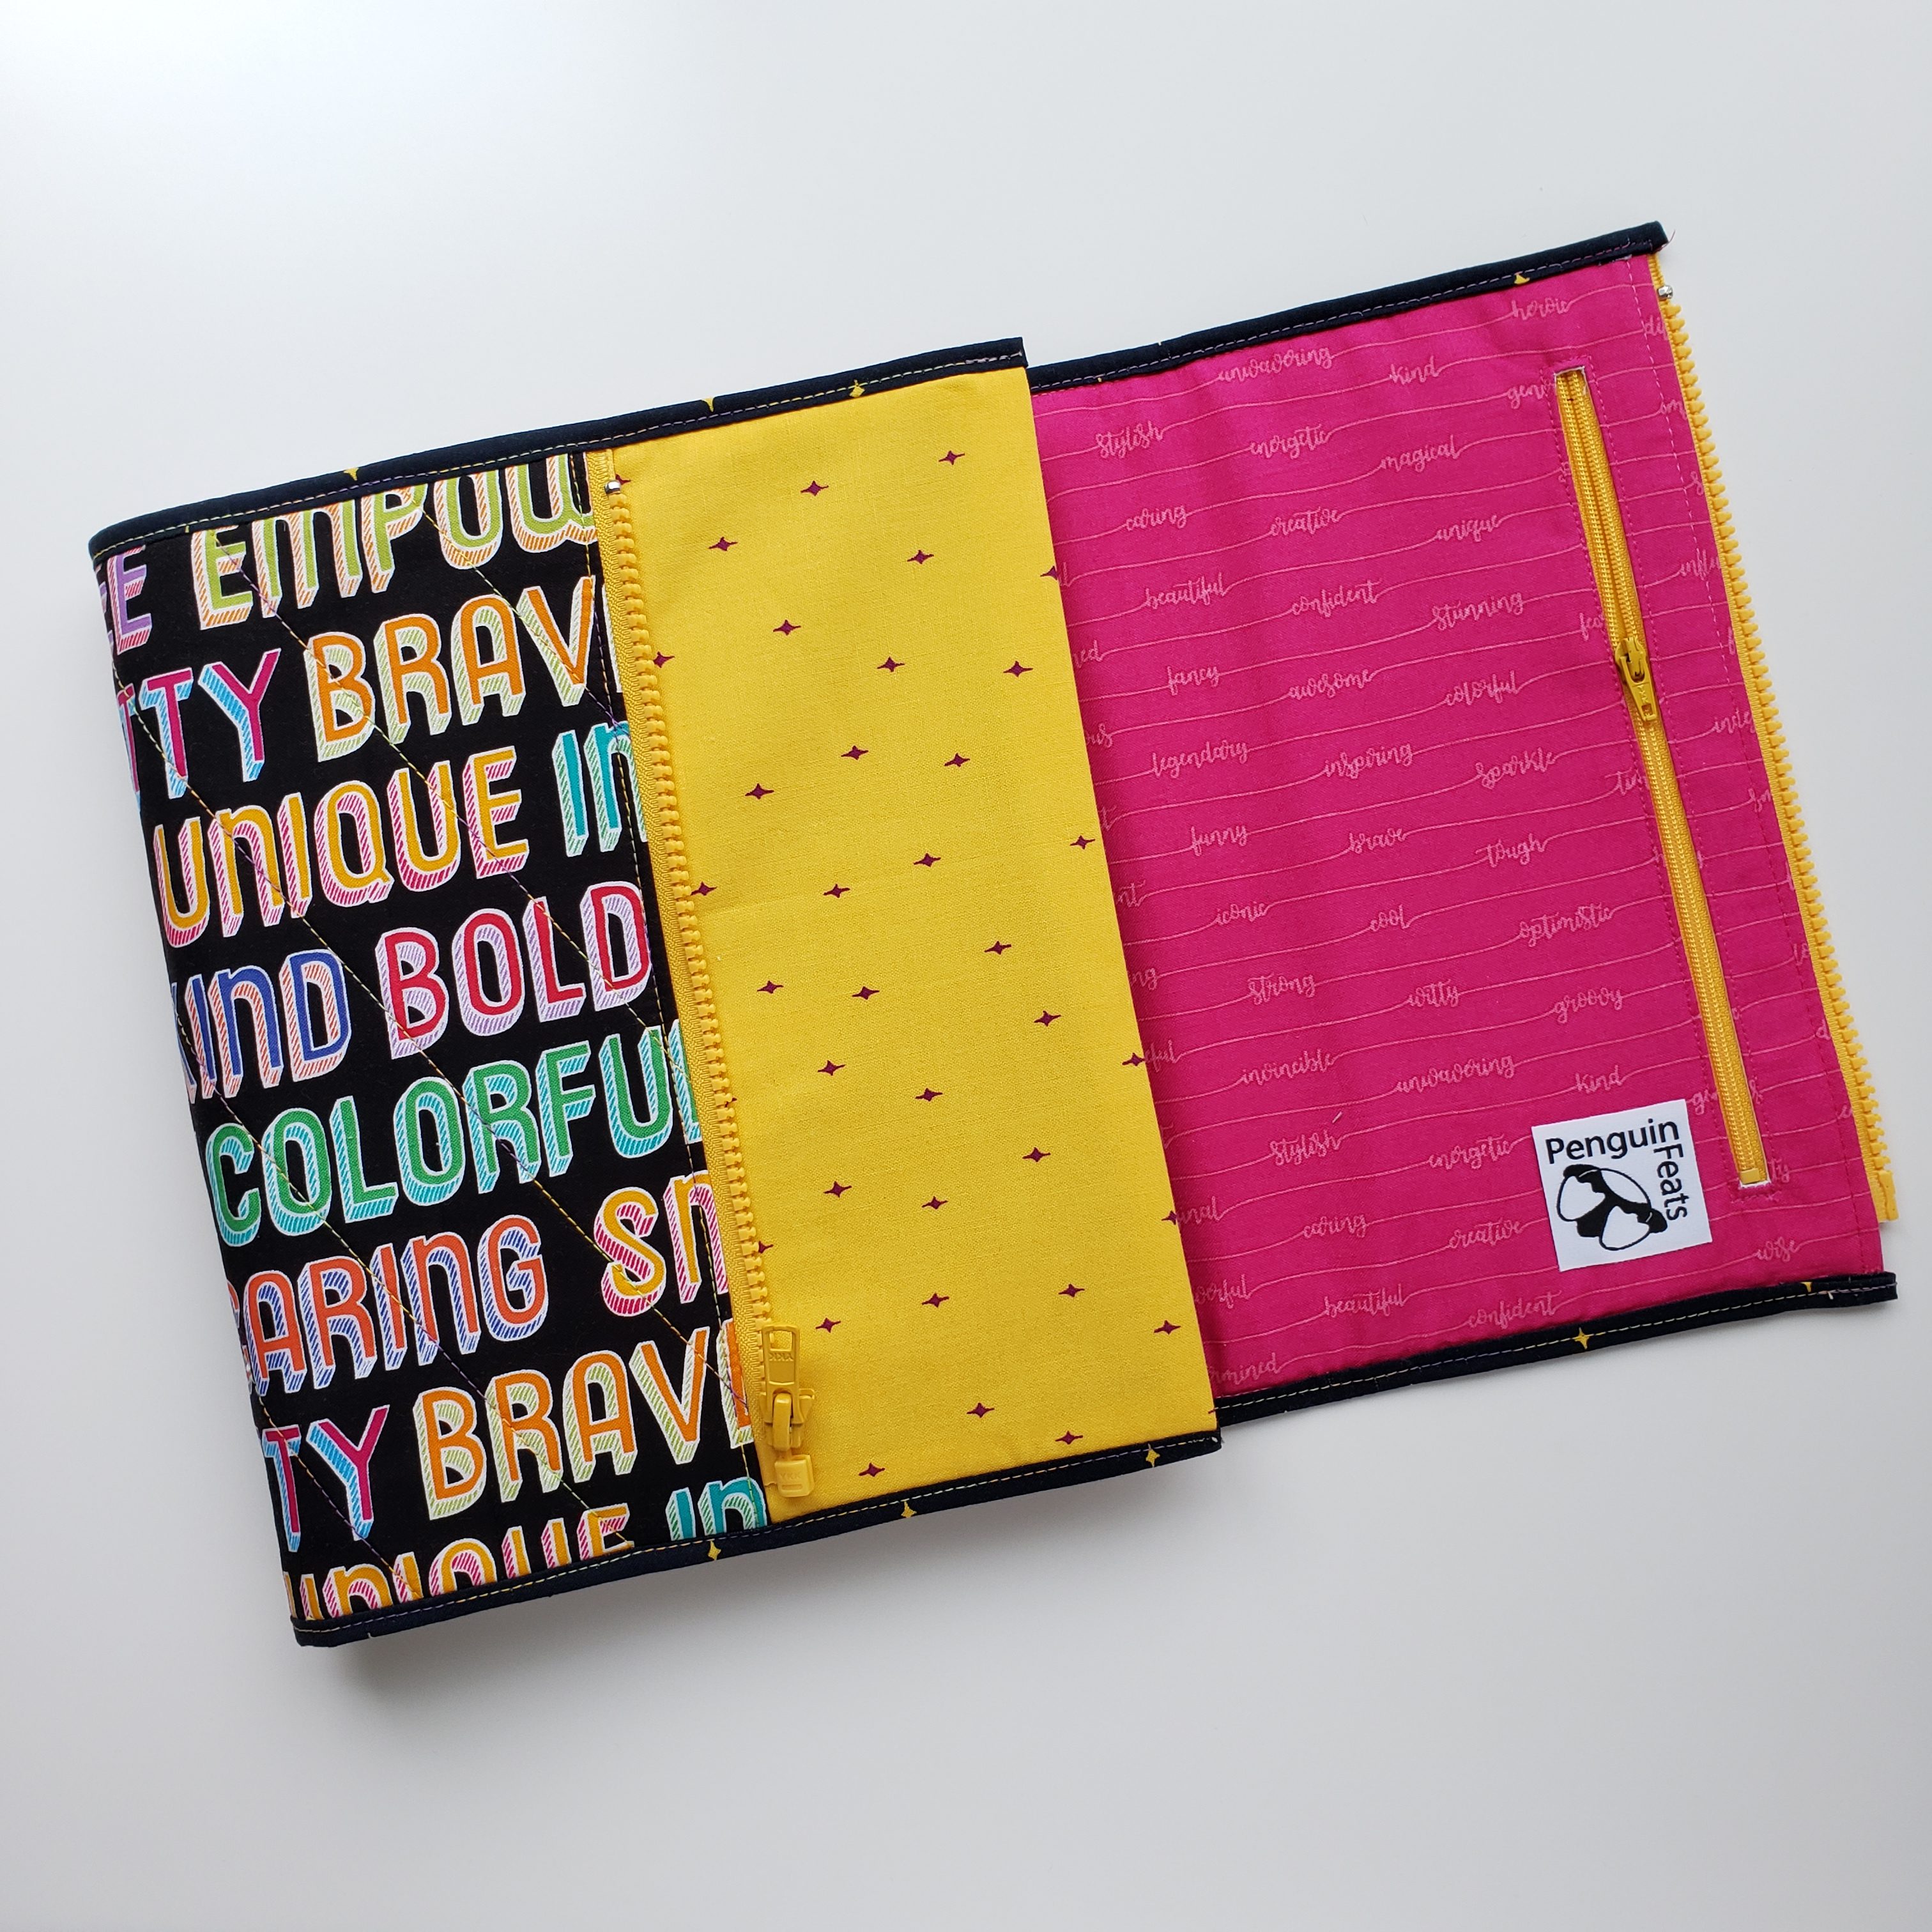
My 2020 Quilter’s Planner arrived last week, and I had a jacket all ready for it.


This new jacket has a different edge.  I tried a finish with binding for a new look.  I am working on a rewrite of the Sketchbook Jacket pattern to include this as an option.  You can get the current PDF version of the Sketchbook Jacket pattern in my Payhip shop HERE.  I will post an update for the pattern when the bound version is included.

I ordered the unbound planner, which came without a cover.  Of course I had to make a rigid cover for the planner to fit in its quilted jacket.  I experimented with pieces of fabric between the laminate sheets.  I made a few different ones and so far they are all holding up to the punch.  the 10 mil was the perfect thickness for the covers too….and look at the fabric in there…all safe and protected.  Learning to laminate with 10 mil was fun.  Now I want to laminate all the things!!


I am so excited to plan 2020 with the new options in the Quilter’s Planner.  The dot grid & graph paper pages are going to push me to get my ideas down so I can work them into my plans.

There is so much to look forward to in 2020. What are you most looking forward to in your 2020?


Posted on 42 Comments

Twin Jackets!!

I couldn’t make just one.  Making two was sew much more fun!

Twin Jackets!!

warm quilted jacket


cool quilted jacket

Almost identical…one warm, one cool.  I dug into my stash of Alison Glass fabric to create these quilted jackets using my Sketchbook Jacket pattern.  The quilted jackets are custom made for and wrapped around a 2019 Quilter’s Planner.  Which is your favorite?I have been cooking these jackets up just for you! 

YES!  I want to give these jackets…with a 2019 Quilter’s Planner in each…to YOU!

This giveaway is two parts>  one part blog and one part Instagram.


Each package includes:

2019 Quilter’s Planner with custom jacket
the Quilter’s Planner Magazine
Quilter’s Planner Mini planner
Pollen Pillow EPP set


One package will be given to a randomly drawn comment on each post [one from this blog post & one from this Instagram post]

You can comment on both posts [duplicate draws will be redrawn]

Random draw will be Tuesday 23 October 2018 at 7:30 pm PDT.

Here’s how you do it…

  1. Comment here with your email address and/or on the Instagram post.
  2. Tag friends on the Instagram post. Share this blog post on Facebook, Pinterest, or Email using the links at the end of the post.
  3. Follow me>>Penguin Feats on Instagram  and if you are sew inclined to follow the blog using the Subscribe box in the column to the right>>>
  4. Share the love by following The Quilter’s Planner on Instagram and visiting the Quilter’s Planner blog here!  There is a great troop there creating the beautiful planner to make 2019 the best year ever!

*must be 18 years or older to enter
*this giveaway is in no way endorsed, administered, sponsored by, or associated with Instagram.  

A random comment has been drawn.  The email requesting shipping address has been sent.  Check your email.  If  there is no response by 25 October 8am PDT another comment will be randomly drawn.   

Congratulations to Cathy C.  Your package is on the way…and I hope it makes your 2019 amazing!! 

Posted on 2 Comments

A feature and a tip…

In September I attended the first ever SewPro Convention.  I learned a lot and met so many fantastic people.  Among them was Anne Beier of Hudson Valley Quilts.  I feel so fortunate to have connected with her!  She is an energetic and studious sewist.  I love her inquisitive nature and her ability to turn her ideas into words.

This is why I feel so lucky to be featured on her blog.  Not only have we become friends, but we are collaborative colleagues now.

Please visit Anne’s blog if you want to get to know me and check out the fabulous giveaway we are offering together.

I am also offering a couple of Half Square Triangle [HST] assembly tips if you are interested in working with HSTs.

There are so many ways to make HSTs.  You can make them one at a time, two at a time, 4 at a time and even 8 or more at a time!  I prefer to make mine 2 at at time.  For me, this way works best because there is less waste and not as much need for squaring up.  I like using this method for HSTs smaller than 5 inches because it requires no marking.

One of the features I love about my Bernina is the measurements marked on my sewing table.  So I use the 1/4 inch mark to line up the tape with the edge of my 1/4 inch foot.

Bernina sewing table

Place a 4 or 5 inch piece of painter’s tape or washi tape on the table of your sewing machine making sure to line it up with the edge of your 1/4 inch foot.placement of tape guide

Set up your squares in pairs, Right Sides Together (RST) with corners lined up.

Start by aligning the back corner of your square pair with the edge of your presser foot.  Then align the opposite corner with the edge of the tape, while keeping this corner aligned with the tape, stitch your seam.

Align corners with foot and tape

You can chain piece the HSTs by aligning the next square with the edge of the presser foot and tape.  I like to pull about an inch of thread between each square.

align corners with edge of foot and tape

To stitch on the other side of center, turn squares around and align the corners with the seam you already stitched to the left of the presser foot.

turn squares and keep stitched seam to the left

To separate your HSTs,  cut between the seams by aligning your ruler with the two opposite corners.

Trim the ‘dog ears’ of each HST by cutting the corners at the seam perpendicular to the outside raw edge.  When pressed open or to one side the corners will not add bulk to your seams because they are gone.

trim the 'dog ears'

Enjoy making your HSTs.  Please visit Anne at Hudson Valley Quilts to learn a little more about me!