


pattern and design feats
 Over 10 years ago I tried weaving fabric strips into a basket. I had no idea how to weave a basket, but I knew how to create fabric strips. My inspiration was a ceramic dish I purchased while we were living in Italy. I wanted to figure out a way to make a fabric version for use in my studio to store all those little things. I found a tutorial using old maps and was able to adapt it to the fabric strips.
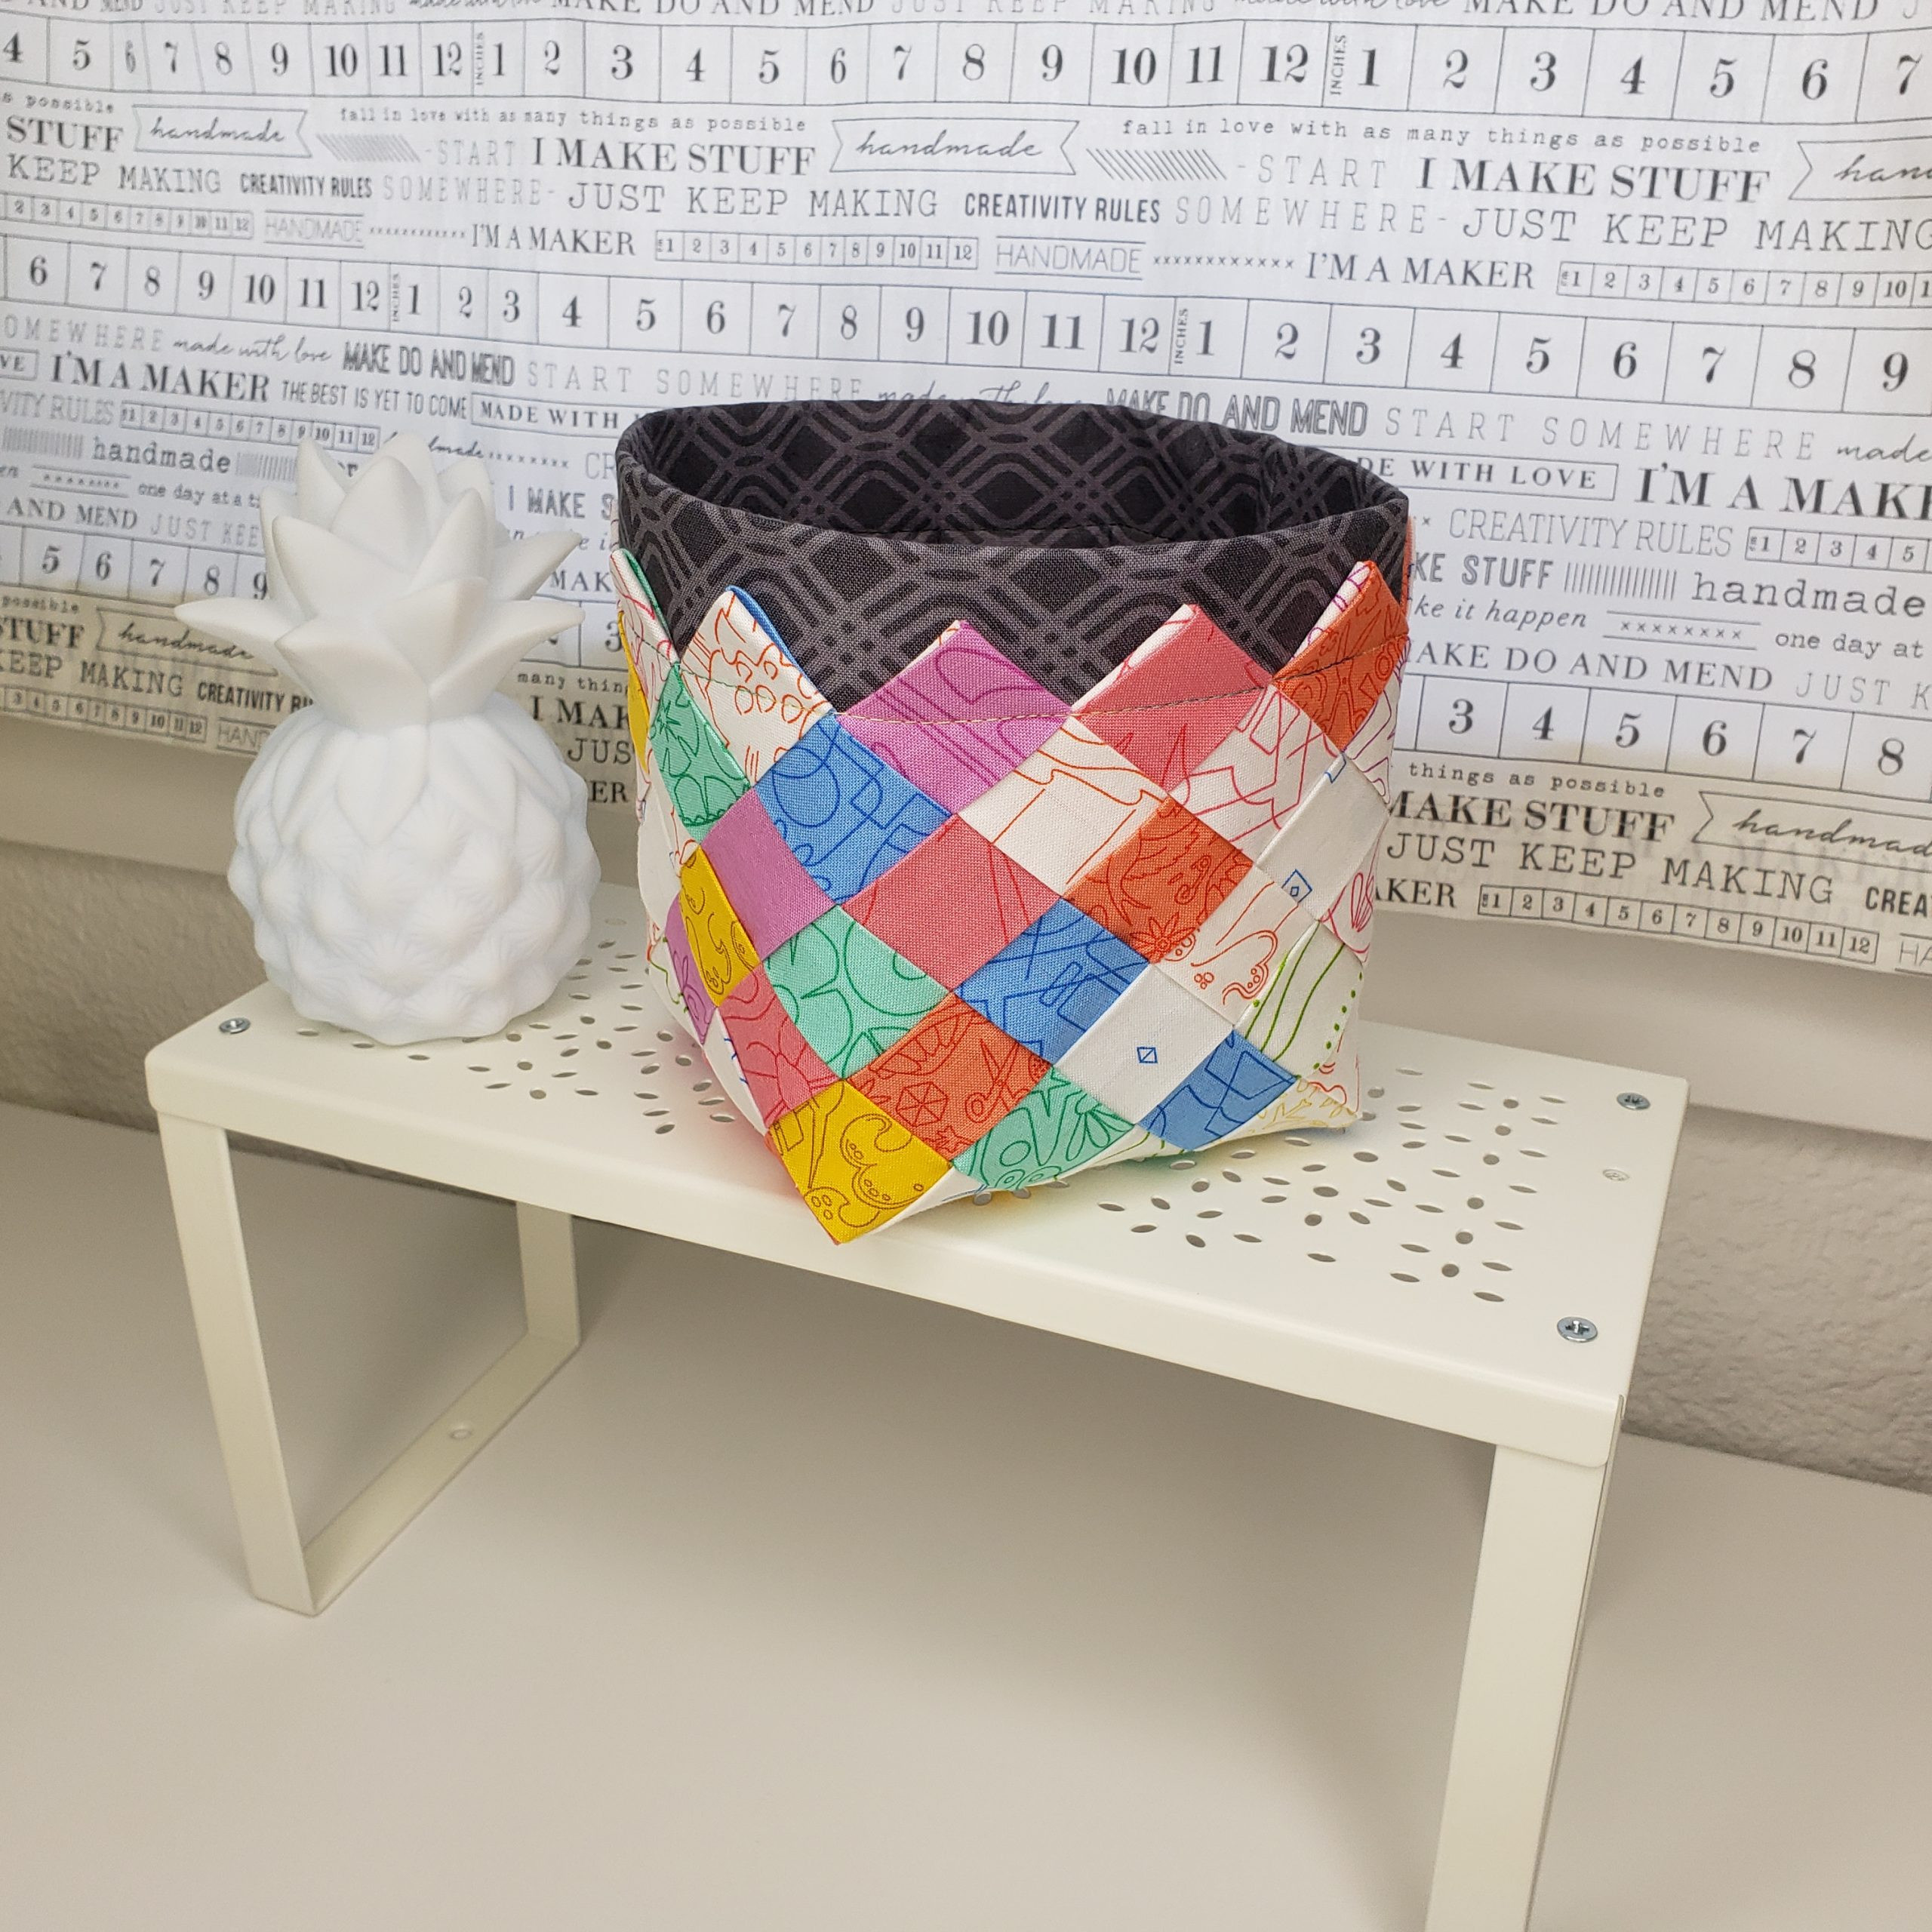
Here is my adaptation of the woven basket.
I love making these little baskets and will be making more and experimenting with the size and lining for different purposes.
Strips of fabric are woven to create a versatile basket for holding all your "eggs". The basket can be upsized using larger strips of fabric and increasing the size of the lining.
12 fabric strips cut 2 inches wide & 22 inches long
Fusible web for medium fabrics (e.g., Dritz 5/8 inch x 18 yard roll precut OR Pellon / HeatnBond 1 1/2 yards cut into 5/8 inch strips)
2 fabric lining pieces cut 9 1/2 x 9 3/4 inch
2 fusible interfacing pieces cut 9 1/2 x 8 3/4 inch (Pellon Decor Bond 809)
Pressing Iron and thick pressing mat
Parchment paper or Pressing Sheet
25 mm bias tape maker
straight pins
craft clips
craft tweezers


This year has been a bit off course from what I imagined. I have not completed the projects & goals I had for the year. A new year is around the corner and life is settling down a bit here so it is the perfect time to step back and try this plan again….and maybe add some new ideas!
My 2020 Quilter’s Planner arrived last week, and I had a jacket all ready for it.

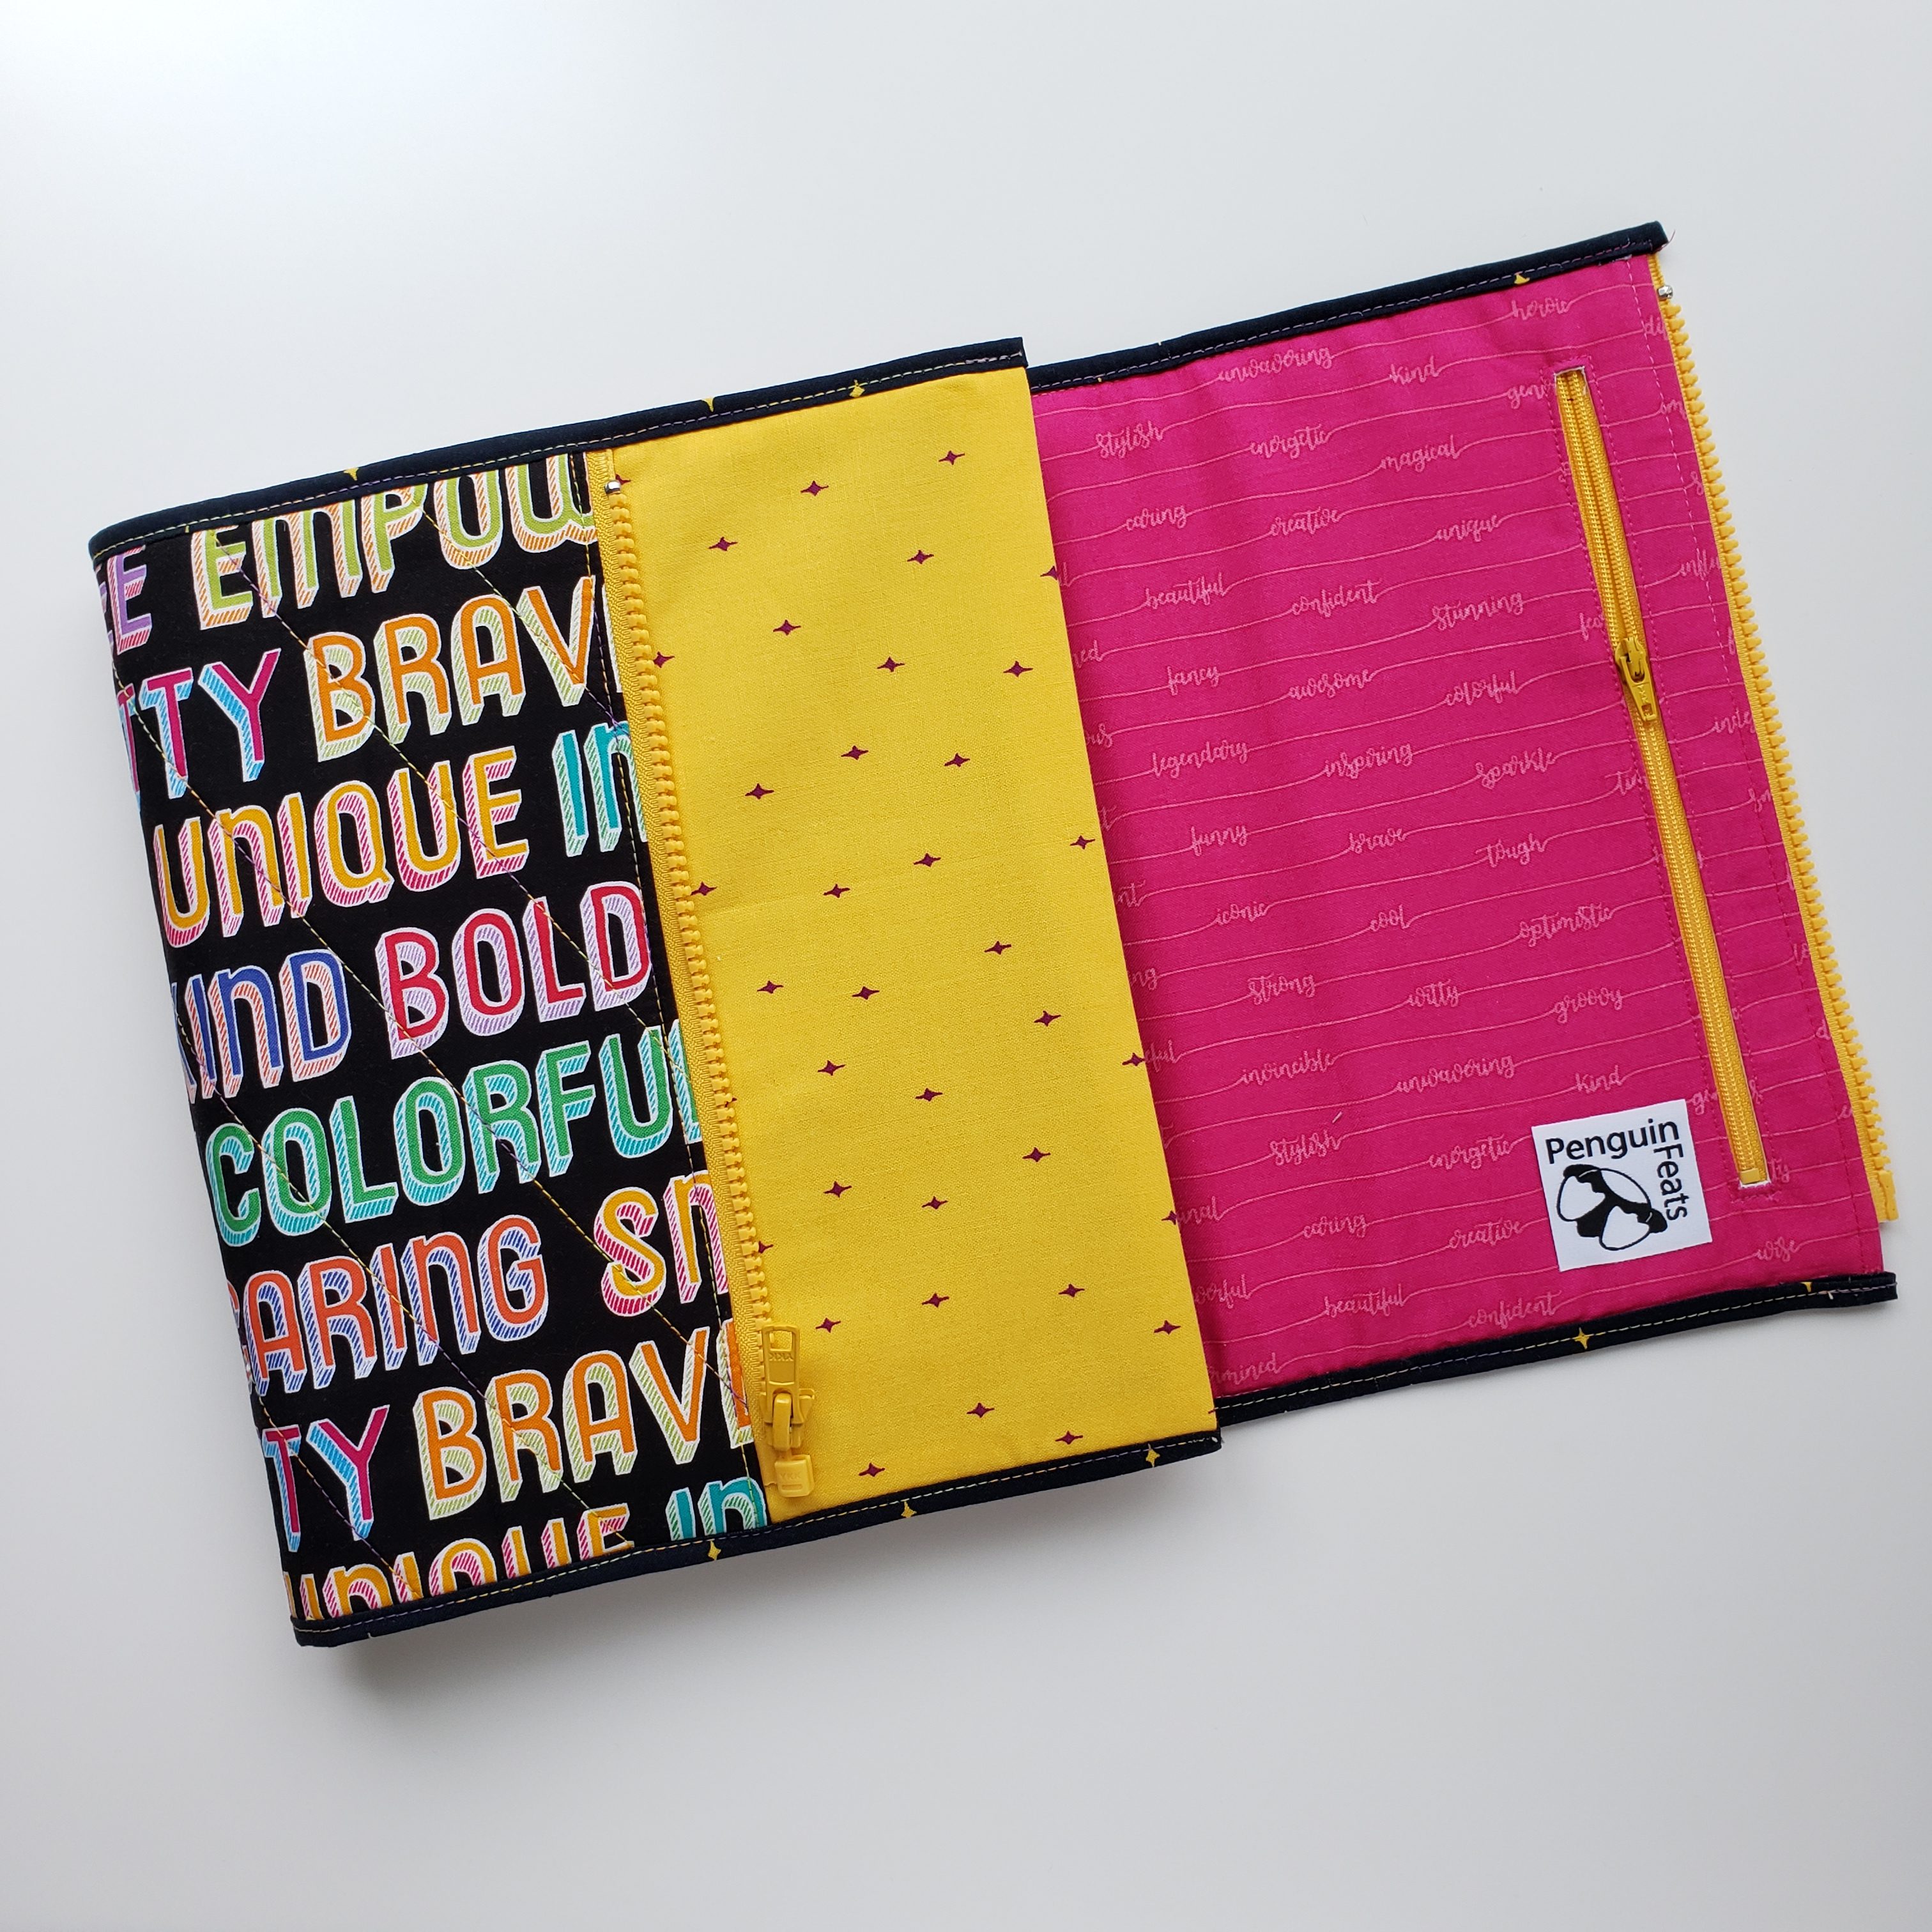
This new jacket has a different edge. I tried a finish with binding for a new look. I am working on a rewrite of the Sketchbook Jacket pattern to include this as an option. You can get the current PDF version of the Sketchbook Jacket pattern in my Payhip shop HERE. I will post an update for the pattern when the bound version is included.
 I ordered the unbound planner, which came without a cover. Of course I had to make a rigid cover for the planner to fit in its quilted jacket. I experimented with pieces of fabric between the laminate sheets. I made a few different ones and so far they are all holding up to the punch. the 10 mil was the perfect thickness for the covers too….and look at the fabric in there…all safe and protected. Learning to laminate with 10 mil was fun. Now I want to laminate all the things!!
I am so excited to plan 2020 with the new options in the Quilter’s Planner. The dot grid & graph paper pages are going to push me to get my ideas down so I can work them into my plans.

There is so much to look forward to in 2020. What are you most looking forward to in your 2020?
Stickers!
I have a thing for stickers and I cannot lie. I have been experimenting with different ways to create custom helpers for my Quilter’s Planner. Some have worked great, some not so great.
My first try was to create mini stickers to help keep up with my sewing and quilting tasks.

These stickers are perfect for placing and creating lists in my planner. I use them in the weekly layout columns to schedule time with my sewing machine, cutting table, and sewing prep. I have not quite figured out how to create a cut file for these, so for now I cut them with scissors to fit in my planner pages.
Then I tried to create a printable sticker for formatted sticker pages in circles & rectangles.

These little stickers are formatted to print on Avery sticker pages so no cutting is necessary.
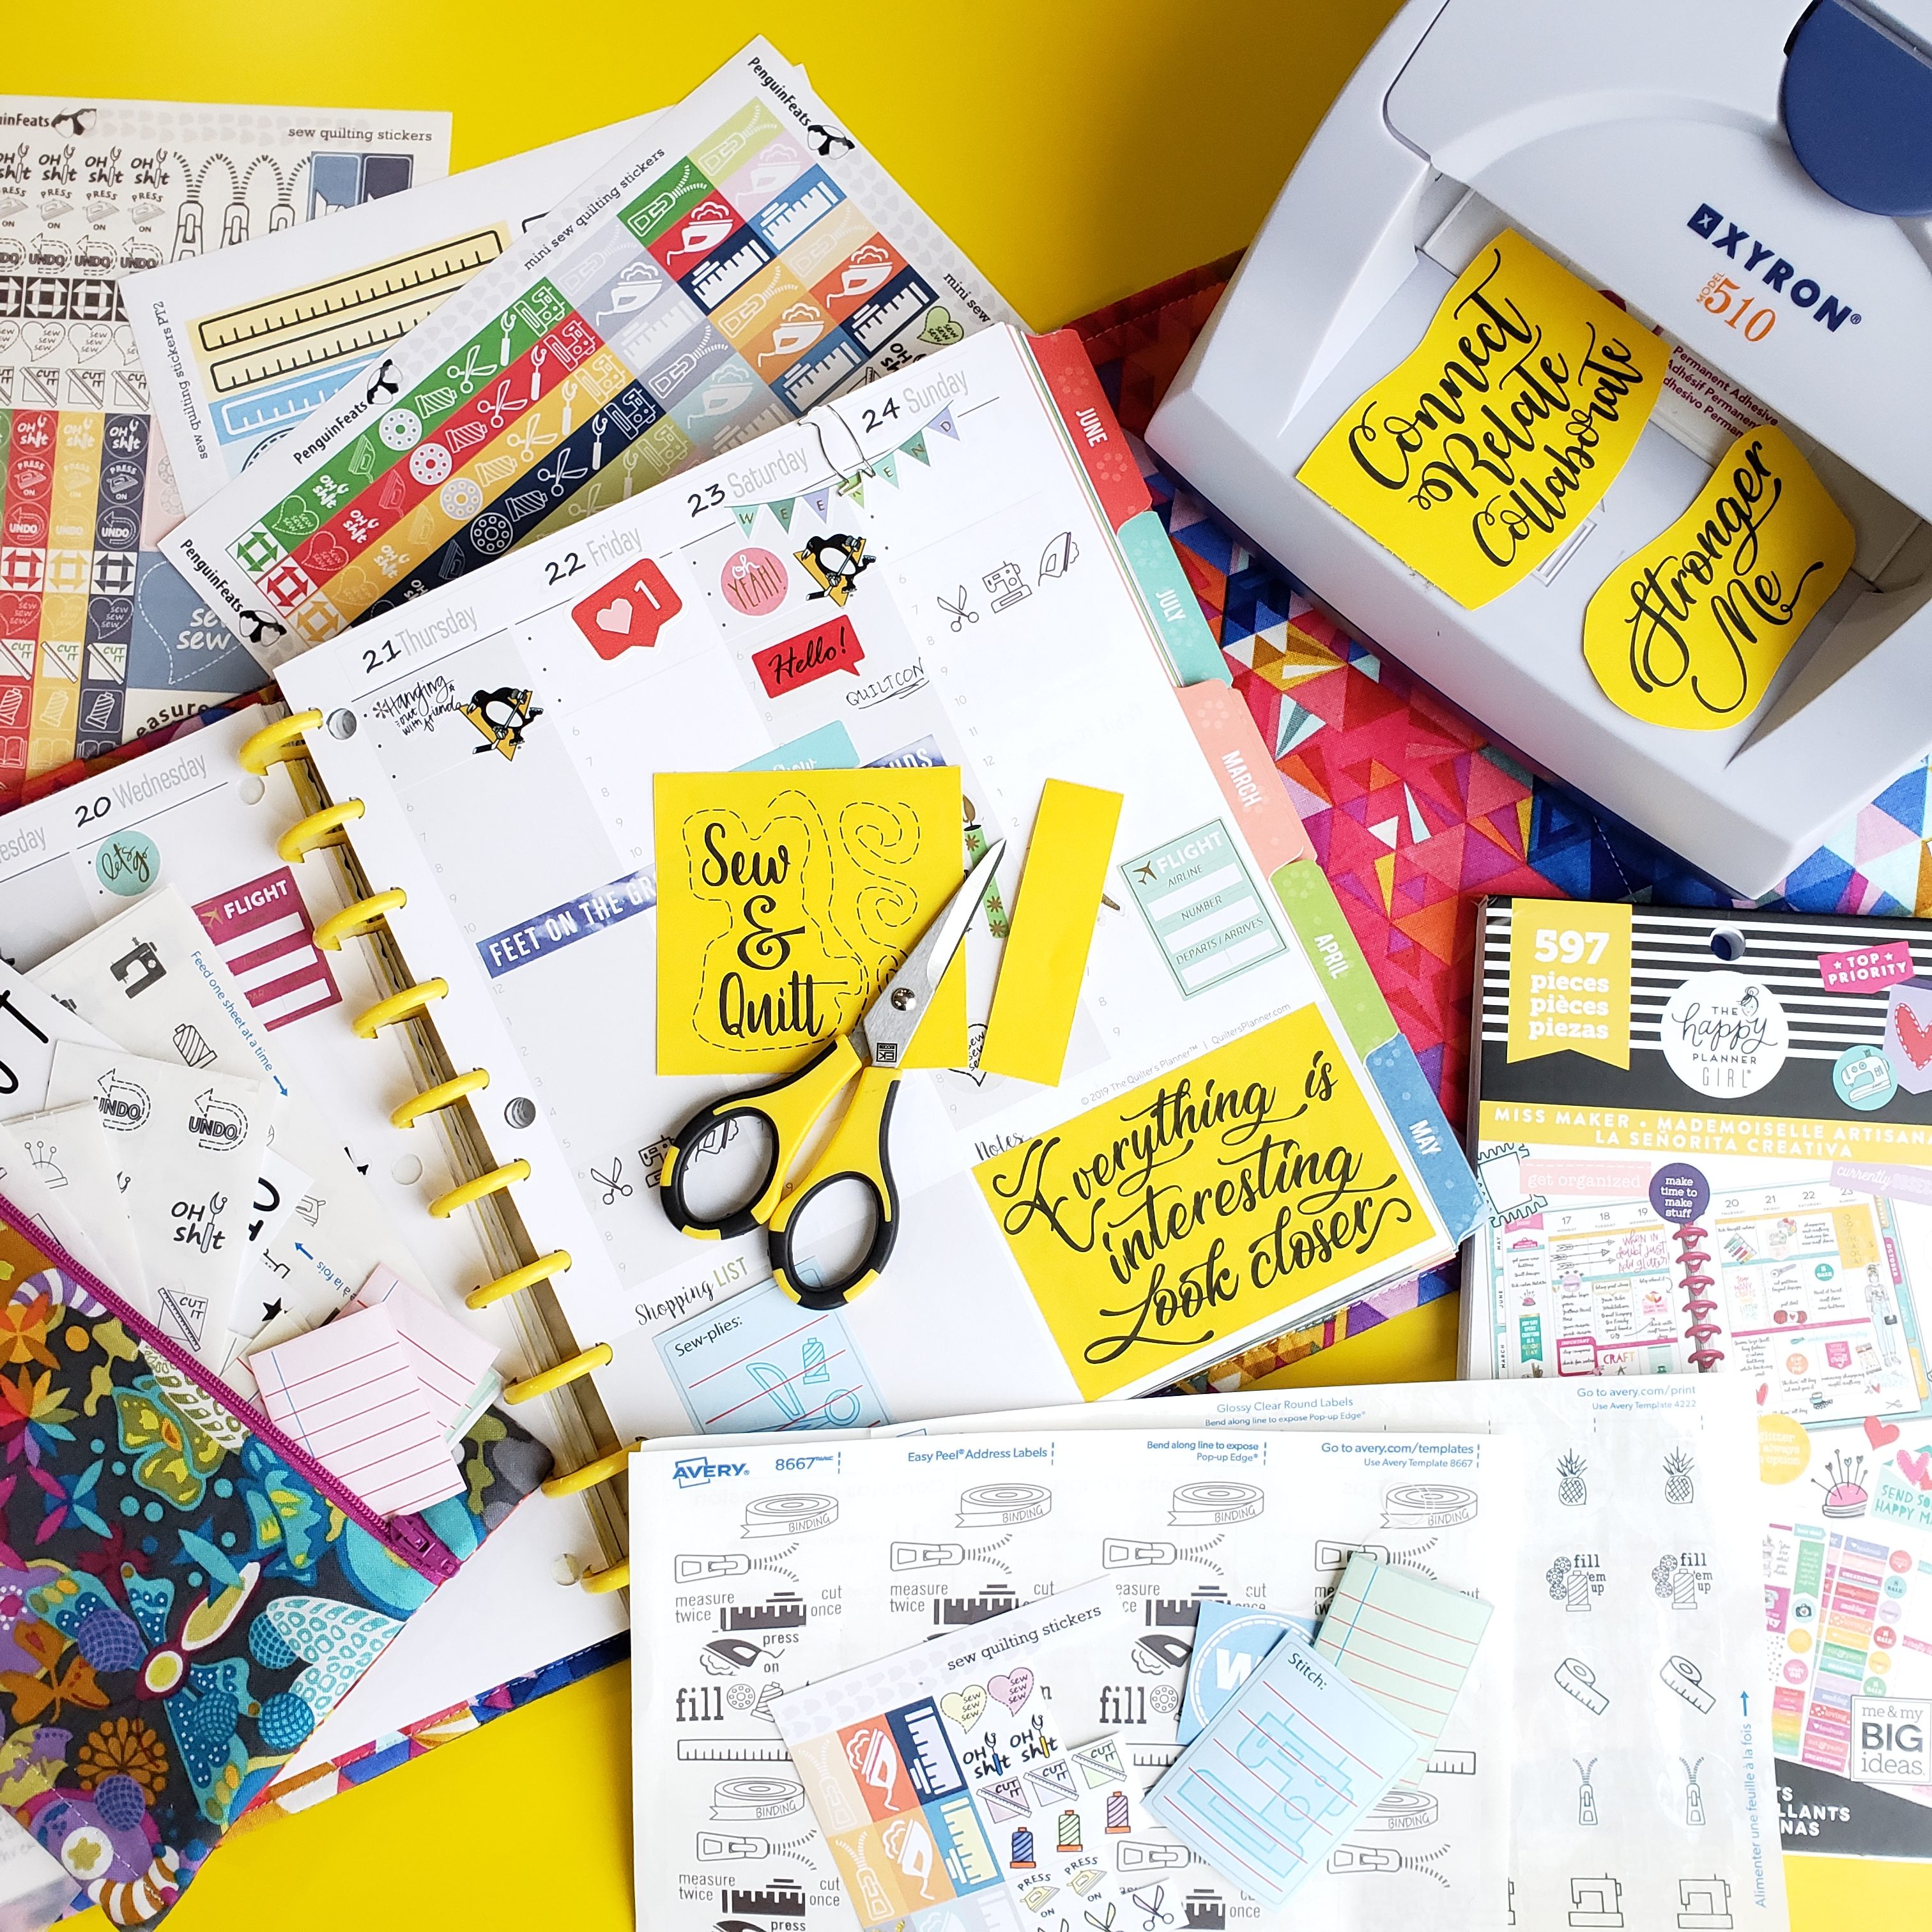
And then I wanted to create stickers out of printed graphics & text for inspirational quotes throughout my planner. This led me to use my Xyron Creative Station. I printed text on colored paper and then cut them into fun shapes. After running them through my little sticker maker I was able to apply them to my goals page to give me extra inspiration to keep going back and visiting my goals page for motivation.

I have since been able to add lots of little motivational stickers through my planner pages to boost my planning goals.
BONUS…a little page of sticker notes to help you plan your sewing & quilting to-do’s. This is a PDF download and can be printed on sticker paper and cut, or, you can print on paper and make stickers with your sticker machine. Click HERE to get the PDF.

I hope you find a little inspiration to help you motivate yourself in the pages of your planner.

I couldn’t make just one. Making two was sew much more fun!
Twin Jackets!!


Almost identical…one warm, one cool. I dug into my stash of Alison Glass fabric to create these quilted jackets using my Sketchbook Jacket pattern. The quilted jackets are custom made for and wrapped around a 2019 Quilter’s Planner. Which is your favorite?I have been cooking these jackets up just for you!
YES! I want to give these jackets…with a 2019 Quilter’s Planner in each…to YOU!
This giveaway is two parts> one part blog and one part Instagram.

Each package includes:
2019 Quilter’s Planner with custom jacket
the Quilter’s Planner Magazine
Quilter’s Planner Mini planner
Pollen Pillow EPP set
One package will be given to a randomly drawn comment on each post [one from this blog post & one from this Instagram post]
You can comment on both posts [duplicate draws will be redrawn]
Random draw will be Tuesday 23 October 2018 at 7:30 pm PDT.
Here’s how you do it…
*must be 18 years or older to enter
*this giveaway is in no way endorsed, administered, sponsored by, or associated with Instagram.
A random comment has been drawn. The email requesting shipping address has been sent. Check your email. If there is no response by 25 October 8am PDT another comment will be randomly drawn.
Congratulations to Cathy C. Your package is on the way…and I hope it makes your 2019 amazing!!


OH the excitement when the 2019 Quilter’s Planner arrived and I opened the beautiful box!! The anticipation of its arrival was intense. Not just because I have a quilt featured in the companion magazine, but, because I want 2019 to be better than 2018…and 2018 has been sooooooo good!
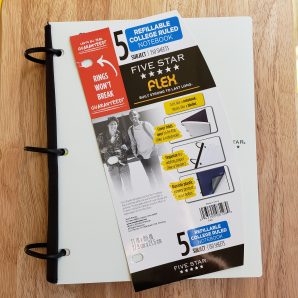
I ordered the unbound version just to experiment with adding pages and extras to my planning pages. I searched for a binder to accommodate the size of the planner and found the Five Star Flex. It is a bit smaller than a regular 3 ring binder so it didn’t bulk up my planner more than I wanted a binder to. The 3 rings are a perfect match for the unbound planner which arrives pre-punched for a standard 3 ring binder. The rings on the planner are flexible and I haven’t decided if they are a positive or negative yet.

The front and back cover of the flex notebook didn’t quite cover the planner tabs. I purchased some inexpensive chipboard and punched holes in it to create a more rigid cover and back . The more rigid cover now extends out over my planner edge to protect the tabs.
I knew I wanted to create a quilted Sketchbook Jacket for my planner. I always put a jacket on my sketchbooks and planners…it keeps all the papers in and I have a way to zip it up and take it with me. The Sketchbook Jacket PDF pattern is available on Payhip or in my Etsy Shop.
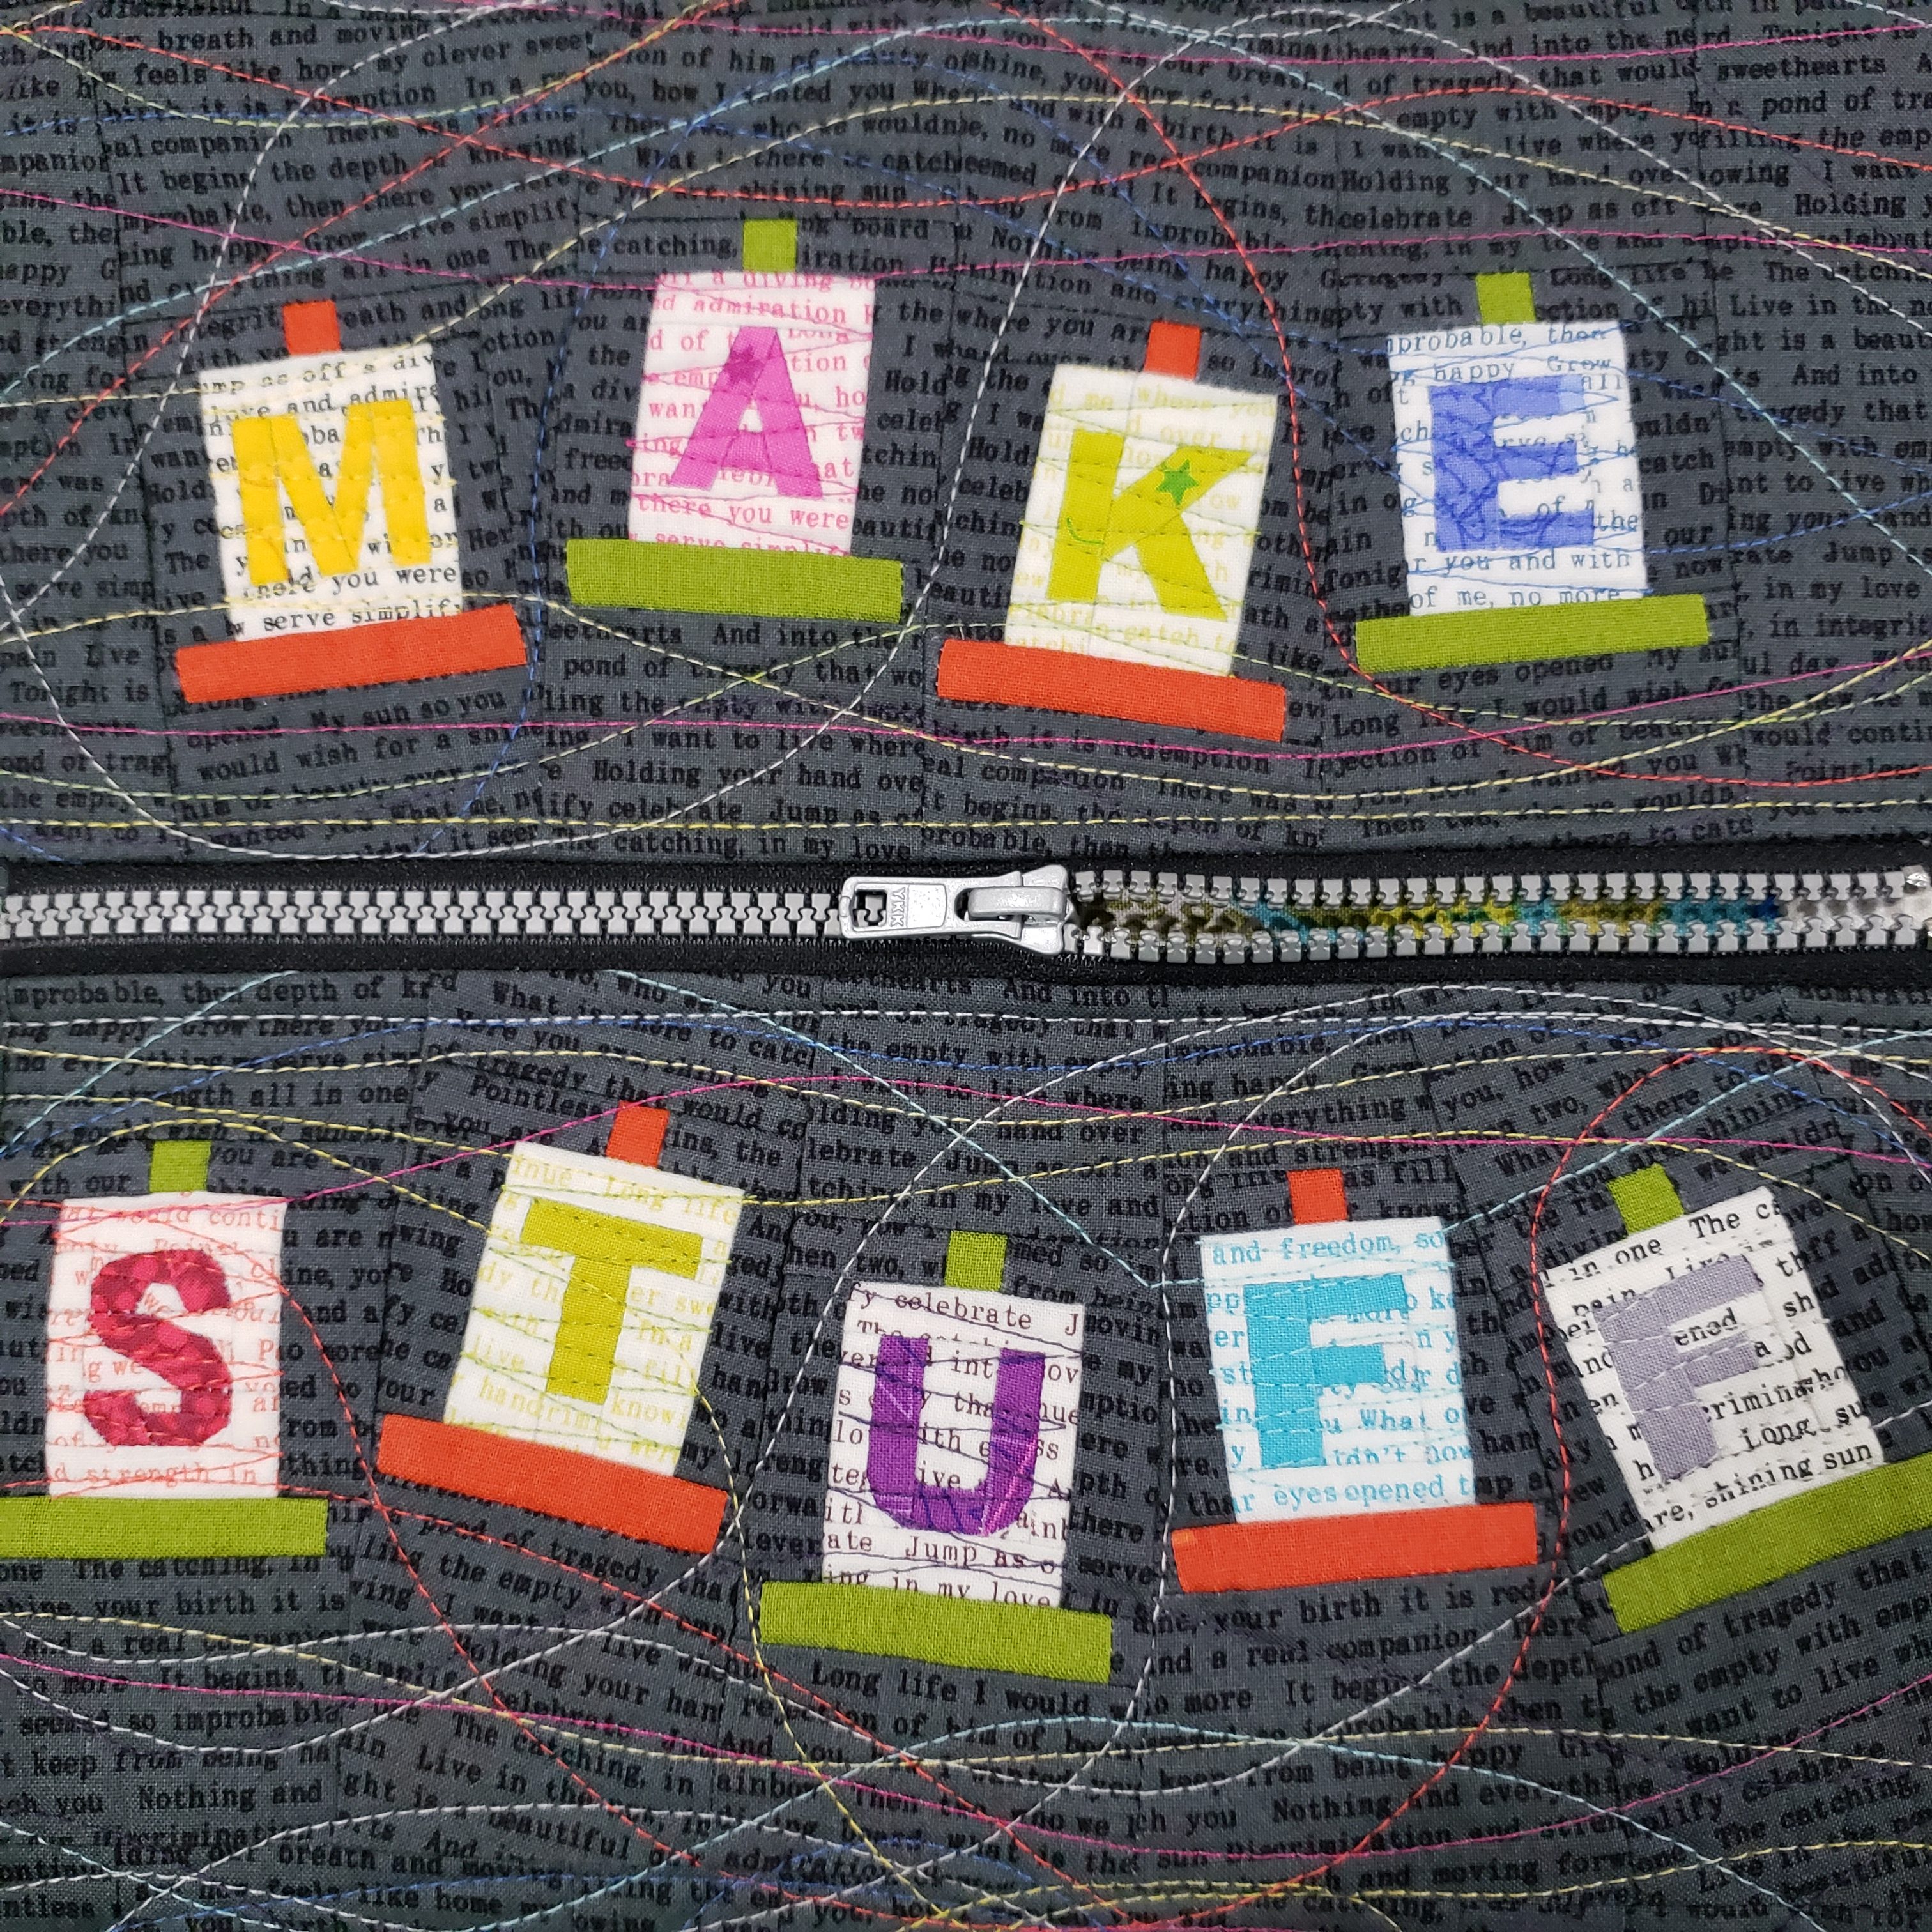
I was racking my brain for a month trying to come up with a mantra like cover design for my planner and remembered the fun Alphabet Spools pattern I had purchased from Quiet Play last year. Those spools with the little alphabet letters were just waiting for me to work them into a project! I love the little letters and how they sit perfectly in the spools…but I needed my spools to look more like my thread rack….

As you can see, I use Aurifil Thread. The 50 & 40 wt. are my go-to threads for quilting, bag making, and all kinds of sewing. And I needed the spools to be small enough to fit within the 11 inch cover of the jacket for the planner.
 Foundation paper piecing is probably my favorite quilting technique. The detail you can get and the ability to scale the pattern gives me so much flexibility when designing a layout. I reduced the Alphabet Spools pattern to 40% and created a new top & bottom for the green and orange to match my thread rack selection.
 I created a mini spool block without letters to fill in the blank space between my lettered spools. This is a simple piecing pattern and I was able to vary the width of some of the blocks to show fuller and emptier spools…all in my favorite colors of course.
The final ‘mash up’ of my Sketchbook Jacket & Alphabet Spools will be the perfect mantra cover for my Quilter’s Planner to keep me in the making mood for 2019. What are you planning for 2019 to keep on track with your goals?


I have been searching high and low for stickers to use in my planner that will fit my sewing related plans. I have found a few, but, nothing that includes all the tasks we sewists like to plan and track.

I found these Avery labels and decided to try them.

I visited Creative Market and Shutterstock looking for vector icon images of sewing related items. I found a few I thought had a good selection of the tools I use and downloaded them. It was so easy and each set came in multiple formats for easy editing.
I was able to add some text and lines to each icon to make it my own. It was a simple copy and past operation to get each new icon to fit into the template.

Adding my logo to the mix of stickers should give me planning motivation for the business related work I need to get done. At least that is the plan!
Some of the stickers are completely my own design and some are designed using the vector icons.
I have more ideas to make into stickers, but for now these will do…and I need to sew, sew, sew.

Right click on this image
click save image as
save to a folder and add it to your own sewing sticker set
Having a quilt pattern in the 2019 Quilter’s Planner is surreal. I have been an avid user of this planner for the last 2 years, admiring the patterns, beautiful photography, and colorful imagery…not to mention the perfect planning tool for everything! And now, my pattern will be part of that…for an entire year!!
Without further ado
I present
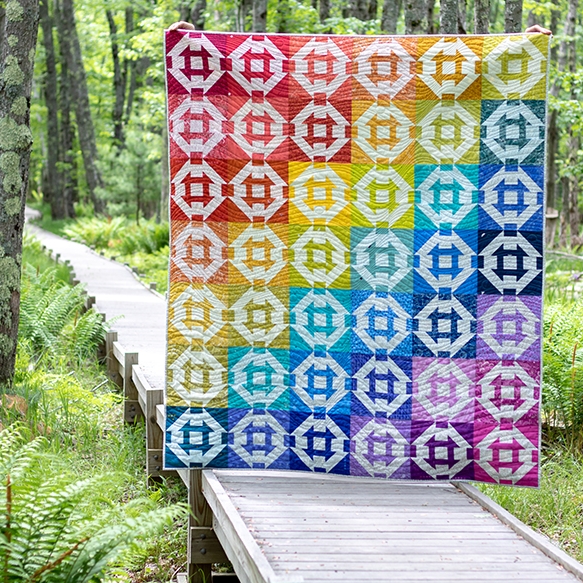
Churn Echoes

The inspiration for this quilt pattern started with a rainbow of fabrics. So many pretty colors in so many different collections!

This selection of Alison Glass fabrics is part of a much larger collection I have been gathering for a few years now. The bright saturated colors with the low volume text prints were the perfect mix for my new pattern.

The low volume text print also presented an opportunity to match the background with a saturated solid block. A favorite classic block with an echo that gives you two churn dashes in one block. Assemble these blocks into rainbow bands and you have ripples of color. The pattern includes directions to create a single color low volume background as well.

Of course you can create your own Churn Echoes quilt with the fabrics you like. There are so many possibilities with this pattern.

Pre-order your Quilter’s Planner today and choose between two different covers! There are 13 patterns in the magazine that comes with your planner…and when you order your planner you will get a bonus pattern to download from your confirmation email!!
Here is the list of fabulous designer and makers with projects in the 2019 Quilter’s Planner . Visit these fabulous designers and makers to see their projects!
Monday, July 23 Cheryl Brickey Meadow Mist Designs @meadowmistdesigns
Wednesday, July 25 Kitty Wilkin Night Quilter @nightquilter
Friday, July 27 Karie Jewell Two Kwik Quilters @karie_twokwikquilters
Monday, July 30 Mandy Leins Mandalei Quilts @mandaleiquilts
Wednesday, August 1 Megan Fisher @ayragon
Friday, August 3 Andrea Tsang Jackson 3rd Story Workshop @3rdstoryworkshop
Monday, August 6 Trinia Braughton Penguin Feats @penquinfeats
Wednesday, August 8 Lee Monroe May Chappell @maychappell
Friday, August 10 Karen Lewis Karen Lewis Textiles @karenlewistextiles
Monday, August 13 Isabelle Selak South Bay Bella Studio @southbaybella
Wednesday, August 15 Sylvia Schaefer Flying Parrot Quilts @flyingparrotquilts
Friday, August 17 Yvonne Fuchs Quilting Jetgirl @quiltingjetgirl
Monday, August 20 Kate Colleran Seams Like a Dream @seamslikeadreamquilts
Wednesday, August 22 Shannon Fraser Shannon Fraser Designs @shannonfraserdesigns
Friday, August 24 Kerry Goulder Kid Giddy @kidgiddy
Monday, August 27 Kitty Wilkin Night Quilter @nightquilter

Pre-orders for the 2019 Quilter’s Planner opened up this past weekend and I have some exciting news to share with this release…
![]()
Yes, that is my name on the cover of The Quilter’s Planner Magazine!

Sitting on this news has not been easy. And look who the featured designer is…
This year you can choose between 2 different covers designed by Camille Roskelley! I love that navy…but the orange peel is speaking to me…this will be a tough decision.
I just might order one of each and decide later which one to keep and which one to gift.
From endings come new beginnings!
This quilt!

For the last three years I have been part of a quilting bee. A quilting bee of 13 ladies from all over the USA (and now Ireland) who quilt for each other every month and share a love of quilting & sewing. We have gotten to know each other over the distance and some have managed to meet in person. As 2017 ended, we decided to disband our hive. We have managed to stay in touch and share our sewing adventures. My bucket list includes meeting all of them in person.
July was my month to choose a block. I sent the background fabric to all my hivemates and in return I asked them to send me the Alpine block. I also requested any violet scraps in 2 1/2 inch squares to be sent with the blocks.
I was on a mission to make a full size quilt for my cousin Jessica.
Jessica is an amazing young lady! At 15 she was diagnosed with Hodgkin Lymphoma and began her first fight for remission. She got there. She came to visit me in Hawaii with her sister and we had so much fun. I promised to make her a quilt during that visit over 2 years ago. After living a nomadic life for a year and buying a house I finally finished that quilt and sent it to her this week. During the time I was making this quilt, Jessica was fighting for the 2nd time to beat Hodgkin Lymphoma. At the end of 2017 she beat the disease, again!! She will turn 18 soon, and I am so happy I finally was able to get this quilt finished and sent to her.


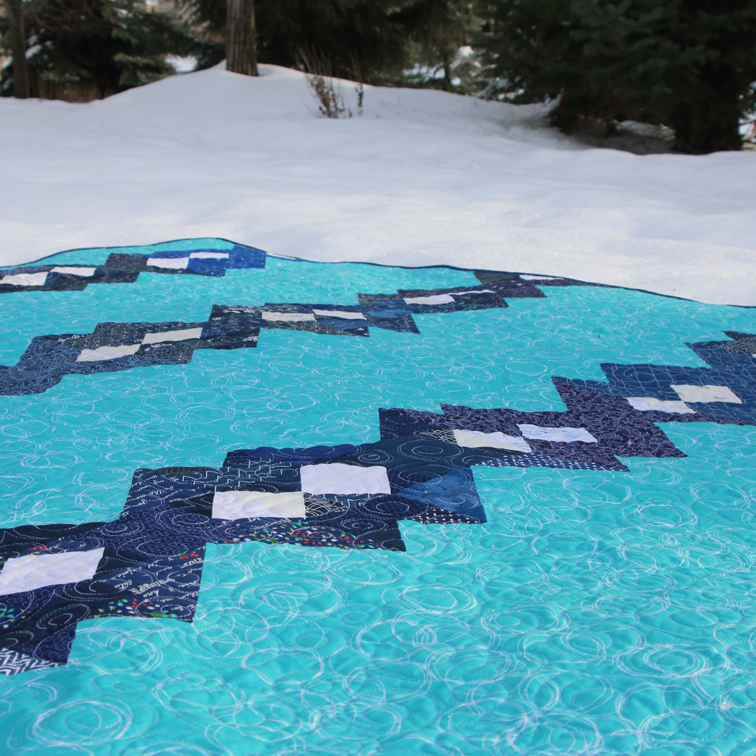
I asked my hivemates to create a block for the back with a message to sew into the quilt. A lot of love is stitched in this quilt.

A pixelated violet ribbon is centered in the back using the fabric scraps sent by my hivemates.

The pixel blocks start small in the center and double in size as they reach the outside edge of the quilt.

Quilted using Twirls for fluid movement and quilty crinkle.

Endings make way for new beginnings. A new lease on life. A new adventure. A new project.
So at the start of 2018, I wish new beginnings for all of you.


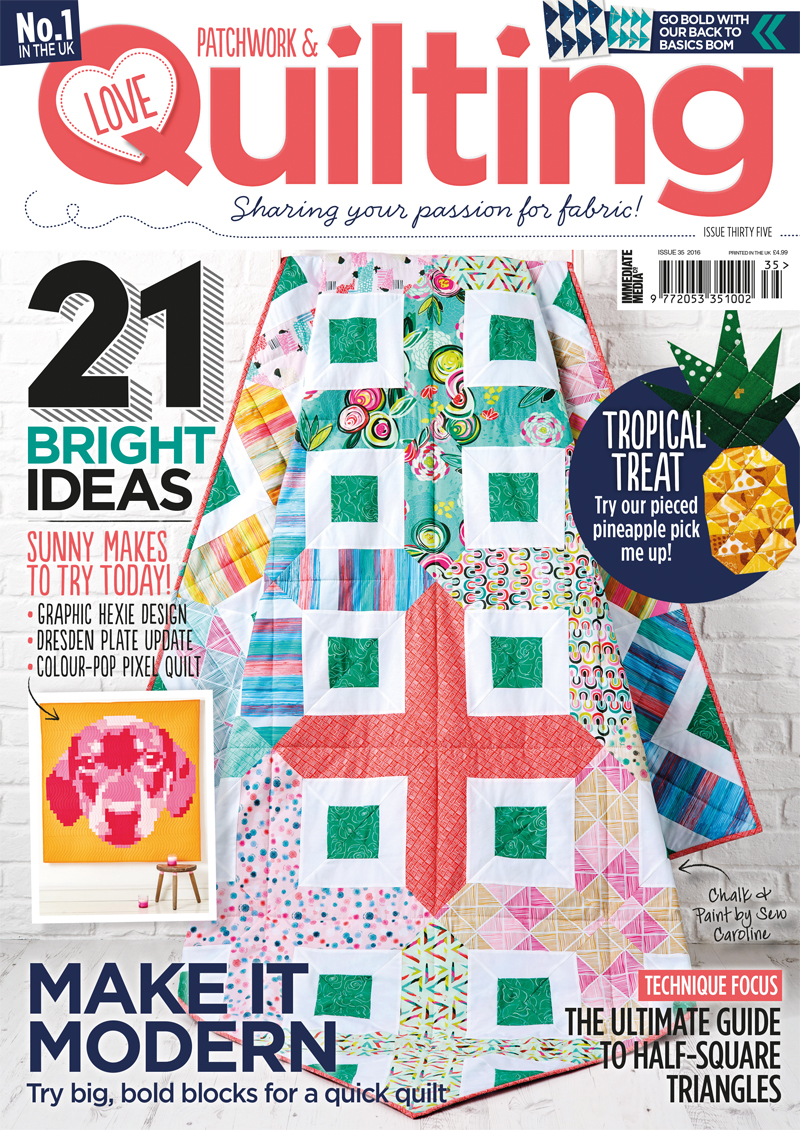

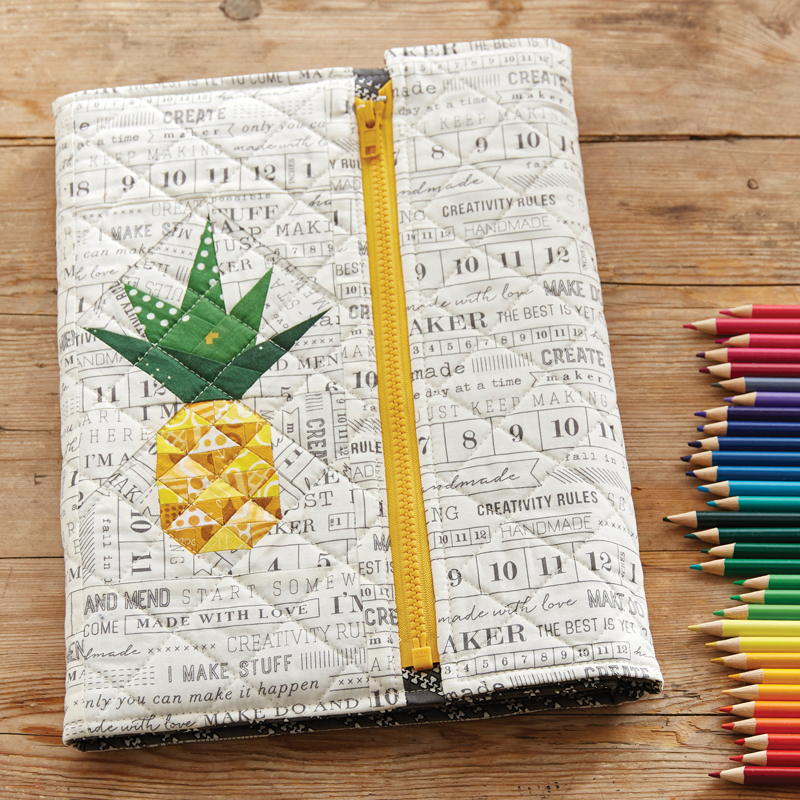
I am so excited to present my first magazine submission….and it made the cover!!
It’s a tropical treat!!
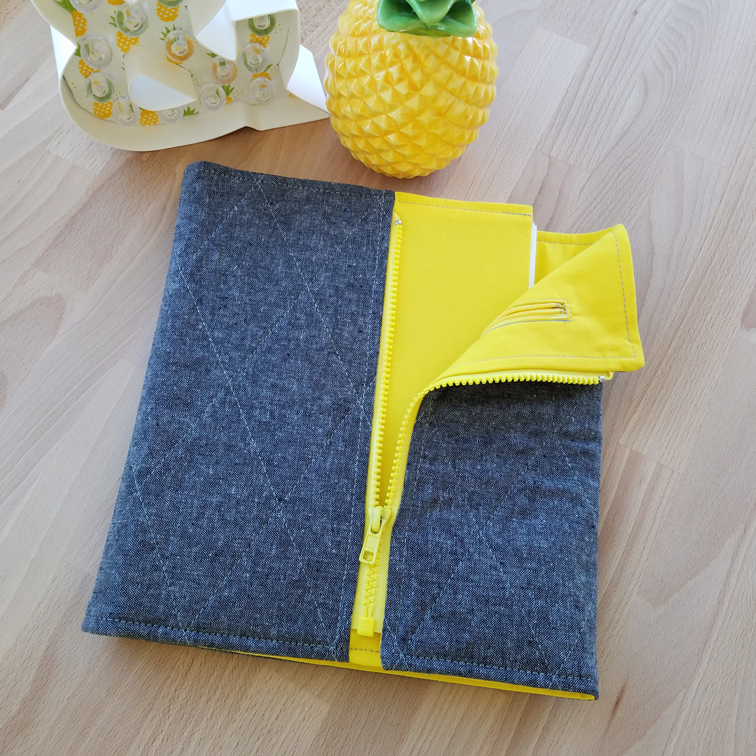
I was trying to come up with a very small pineapple block to work into a cover for my sketchbook. I had already worked out a pattern for a larger pineapple block (11 in x 7 in) but I wanted one that would be small enough to fit within the cover of a sketchbook. So I reworked the pattern and stitched out a sample. Perfect.

Then, I began to work on a pattern for the sketchbook cover. I wanted something that would close with a zipper, but, wanted to use up my separating zippers. And the quilted sketchbook jacket was born.
I was super happy with the prototype and wanted to get some exposure for the pattern. I have a pattern on Craftsy, and while it is a great venue for selling indie designer patterns, I don’t know how to get more exposure for it and really wanted this pattern to get more exposure. So, I went about researching magazine submissions. I absolutely adore Love Patchwork & Quilting Magazine out of the UK. My subscription started in 2014 and I love all the content the magazine brings. While I wish the delivery was much quicker….good things come to those who wait, right?
I wanted to see if LP&Q would be interested in my pattern. The email was written about 10 days before I even sent it off…as I debated whether my submission would even be seen let alone accepted. It is a big step to take sending your ideas off to an editor and submit to the aesthetic of someone far off you have never met. But, I took the plunge and clicked the Send Button on the email with images attached.
To my utter astonishment and delight the reply to my email was prompt and my submission accepted! I was pinching myself for days! Then, the real work began because I now had a deadline…a real deadline!
The deadline was met and my samples were sent off….and LP&Q worked their magic on the magazine layout! Oh and those images are magic!! Thank you for a great experience Love Patchwork & Quilting!!
The magazine was released May 25th, and will be available in the US in 2-4 weeks. Bookstores & Quilt Shops carry single issues, and you can get this beautiful magazine delivered to your door or your mobile device. Visit the Love Patchwork & Quilting website to find out how!!
I have created a mod for the pattern to add a zipper pocket to the inside cover. The pocket will be perfect for holding pens & pencils while you travel with your sketchbook. Look for the post within the next week.
When you make a quilted sketchbook cover, please take a picture and tag @penguinfeats on Instagram or Penguin Feats on Facebook.
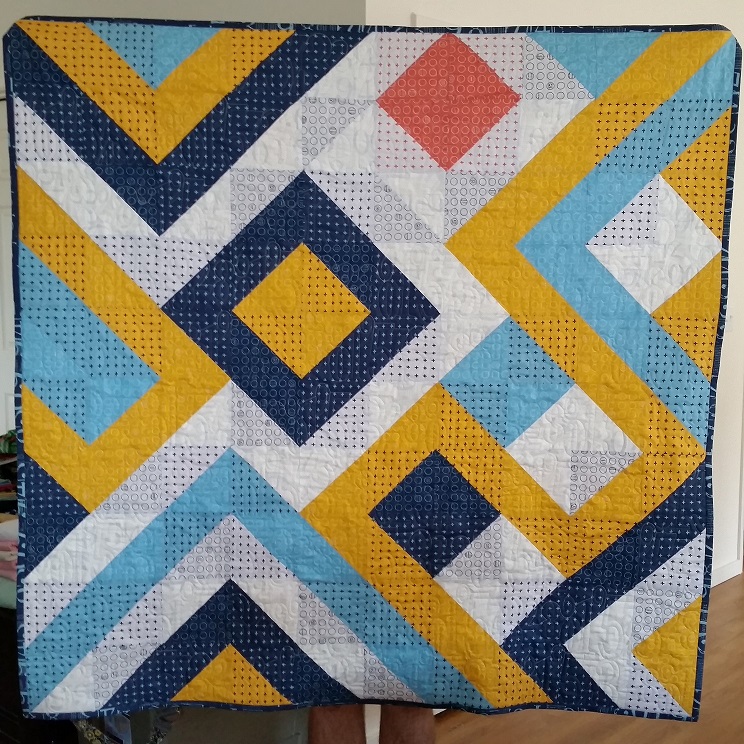
My first pattern!!
Ten Squared is now a pattern…celebration time!! You can find it in my pattern store on Craftsy. Find the pattern in my Etsy Store.
It all started with half square triangles (HSTs). I wanted to make an entire quilt with HSTs. And this was the product of that exploration.

When I started I had no intention of making this into a pattern. I just wanted to experiment with HSTs. First I started out with a rough sketch of what I wanted to do with the squares and the lines going around them. Then, I selected 5 colors and chose 2 to 3 different fabrics in each of those 5 colors. Using those fabrics, I cut 6 inch squares and just made a whole bunch of HSTs using the fabrics I chose. After I started placing them on my design wall, I saw that I was not going to get the exact image of my sketch because of the grid the HSTs fell on. So I modified it a bit and let the HSTs take me where they would allow.
I really wanted something asymmetrical with some dynamic movement. The high contrast of the fabrics really plays well with those elements and gives this quilt a serious pop!
So I was asked a few times if I was making a pattern, and this being my first quilt from start to finish I wasn’t sure if I could even sell my own pattern, let alone design it for others to understand. But, I set out to try to make my first pattern.
I even made a second Ten Squared to see if I could recreate it. This one was for my husband, and I used 7.5 inch squares.

After putting some directions down on paper and trying out a few tests patterns, in extra large and miniature form, I asked a few friends to test the pattern for me. I received some amazing photo samples of the quilts they made.
This quilt was used from a fat quarter set I sent with the tester…and she did an amazing job.

A friend who has just started her quilting journey put this beauty together, and it was only her second quilt!

Ten Squared is a PDF pattern only available for download on Craftsy Etsy Store. This pattern is considered a beginner pattern. There is limited instruction of assembling HSTs. The finished size of this quilt depends on the size of square you start with. The pattern includes some fabric requirements and finished measurements for some standard size quilts. I have included a coloring page with the pattern so you can audition different colors and fabric choices to get your quilt just right for you.
If you make a Ten Squared quilt, please post an image of the project on Craftsy Etsy Storeunder the Finished Project link on the pattern page. If you share your quilt on social media, be sure to use #tensquaredquilt and tag me @penguinfeats so I can see your quilt! I would love to see your interpretation of the pattern!


