Posted on 1 Comment

Churn Echoes for The Quilter’s Planner 2019

photo taken by Kitty Wilkin @nightquilter for The Quilter's Planner 2019 @thequiltersplanner

Having a quilt pattern in the 2019 Quilter’s Planner is surreal.  I have been an avid user of this planner for the last 2 years, admiring the patterns, beautiful photography, and colorful imagery…not to mention the perfect planning tool for everything!   And now, my pattern will be part of that…for an entire year!!

Without further ado

I present

Churn Echoes

Churn Echoes
photo taken by Kitty Wilkin @nightquilter for The Quilter’s Planner 2019 @thequiltersplanner

The inspiration for this quilt pattern started with a rainbow of fabrics.  So many pretty colors in so many different collections!

Alison Glass Fabric Selection
© 2018 Penguin Feats

This selection of Alison Glass fabrics is part of a much larger collection I have been gathering for a few years now.  The bright saturated colors with the low volume text prints were the perfect mix for my new pattern.

Churn Echoes
© 2018 Penguin Feats

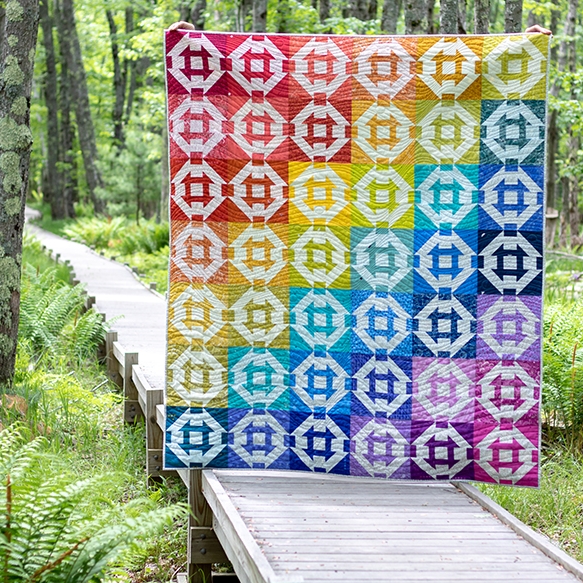
The low volume text print also presented an opportunity to match the background with a saturated solid block.  A favorite classic block with an echo that gives you two churn dashes in one block.  Assemble these blocks into rainbow bands and you have ripples of color.  The pattern includes directions to create a single color low volume background as well.

Churn Echoes
© 2018 Penguin Feats

Of course you can create your own Churn Echoes quilt with the fabrics you like.   There are so many possibilities with this pattern.

photo taken by Kitty Wilkin @nightquilter for The Quilter’s Planner 2019 @thequiltersplanner

Pre-order your Quilter’s Planner today and choose between two different covers!  There are 13 patterns in the magazine that comes with your planner…and when you order your planner you will get a bonus pattern to download from your confirmation email!!order your Quilter's Planner today

Here is the list of fabulous designer and makers with projects in the 2019 Quilter’s Planner .  Visit these fabulous designers and makers to see their projects!

Monday, July 23 Cheryl Brickey Meadow Mist Designs @meadowmistdesigns
Wednesday, July 25 Kitty Wilkin Night Quilter @nightquilter
Friday, July 27 Karie Jewell Two Kwik Quilters @karie_twokwikquilters

Monday, July 30 Mandy Leins Mandalei Quilts @mandaleiquilts
Wednesday, August 1 Megan Fisher @ayragon
Friday, August 3 Andrea Tsang Jackson 3rd Story Workshop @3rdstoryworkshop

Monday, August 6 Trinia Braughton Penguin Feats @penquinfeats
Wednesday, August 8 Lee Monroe May Chappell @maychappell
Friday, August 10  Karen Lewis Karen Lewis Textiles @karenlewistextiles

Monday, August 13 Isabelle Selak South Bay Bella Studio @southbaybella
Wednesday, August 15 Sylvia Schaefer Flying Parrot Quilts @flyingparrotquilts
Friday, August 17 Yvonne Fuchs Quilting Jetgirl @quiltingjetgirl

Monday, August 20 Kate Colleran Seams Like a Dream @seamslikeadreamquilts
Wednesday, August 22 Shannon Fraser Shannon Fraser Designs @shannonfraserdesigns
Friday, August 24 Kerry Goulder Kid Giddy @kidgiddy

Monday, August 27 Kitty Wilkin Night Quilter @nightquilter

photo taken by Kitty Wilkin @nightquilter for The Quilter’s Planner 2019 @thequiltersplanner


Posted on 2 Comments

The Sketchbook Jacket PDF pattern

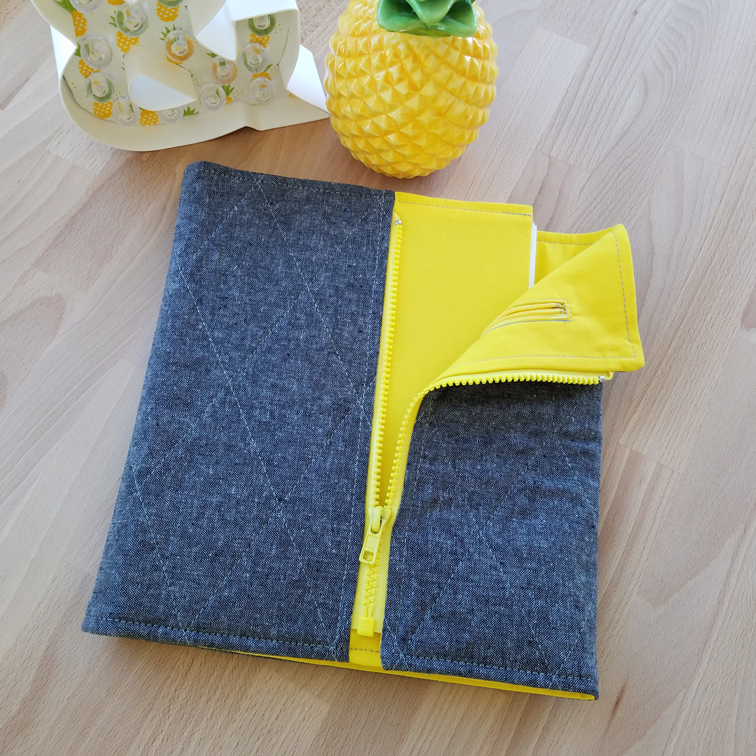
The Sketchbook Jacket PDF pattern is now available. This pattern first appeared in Love Patchwork & Quilting magazine Issue 35. Now you can visit my Payhip pattern shop and purchase the PDF pattern for download.  This pattern includes over 20 color photos to help you visualize the steps in making your very own Sketchbook Jacket.


With the pattern you can create a jacket for almost any book.  The book only needs to have a hard cover.  You can custom make this jacket to fit a planner, reference book, and even a three ring binder.

This Corset Jacket is covering a plain three ring binder I use as a project keeper.

A spiral bound sketchbook can be covered easily as long as the front & back covers are not bendable.  A cardboard or book binders board can be glued to a paper cover on a spiral bound sketchbook.  This will make it easier cover.

The zip pocket on the inside of the jacket will hold pencils, pens, and erasers so you have everything you need at the ready.

The Sketchbook Jacket PDF pattern will be 50% off through February 1st, 2017.

When you make your Sketchbook Jacket, please share it on Instagram, Facebook, or your own blog.  Be sure to tag me @penguinfeats on Instagram & Facebook using #sketchbookjacket and #penguinfeatspattern

I would love to see your version of the Sketchbook Jacket!!

Show me your makes!!

Sketchbook Jacket
Posted on 13 Comments

SewPro Stars and Ten Squared…again

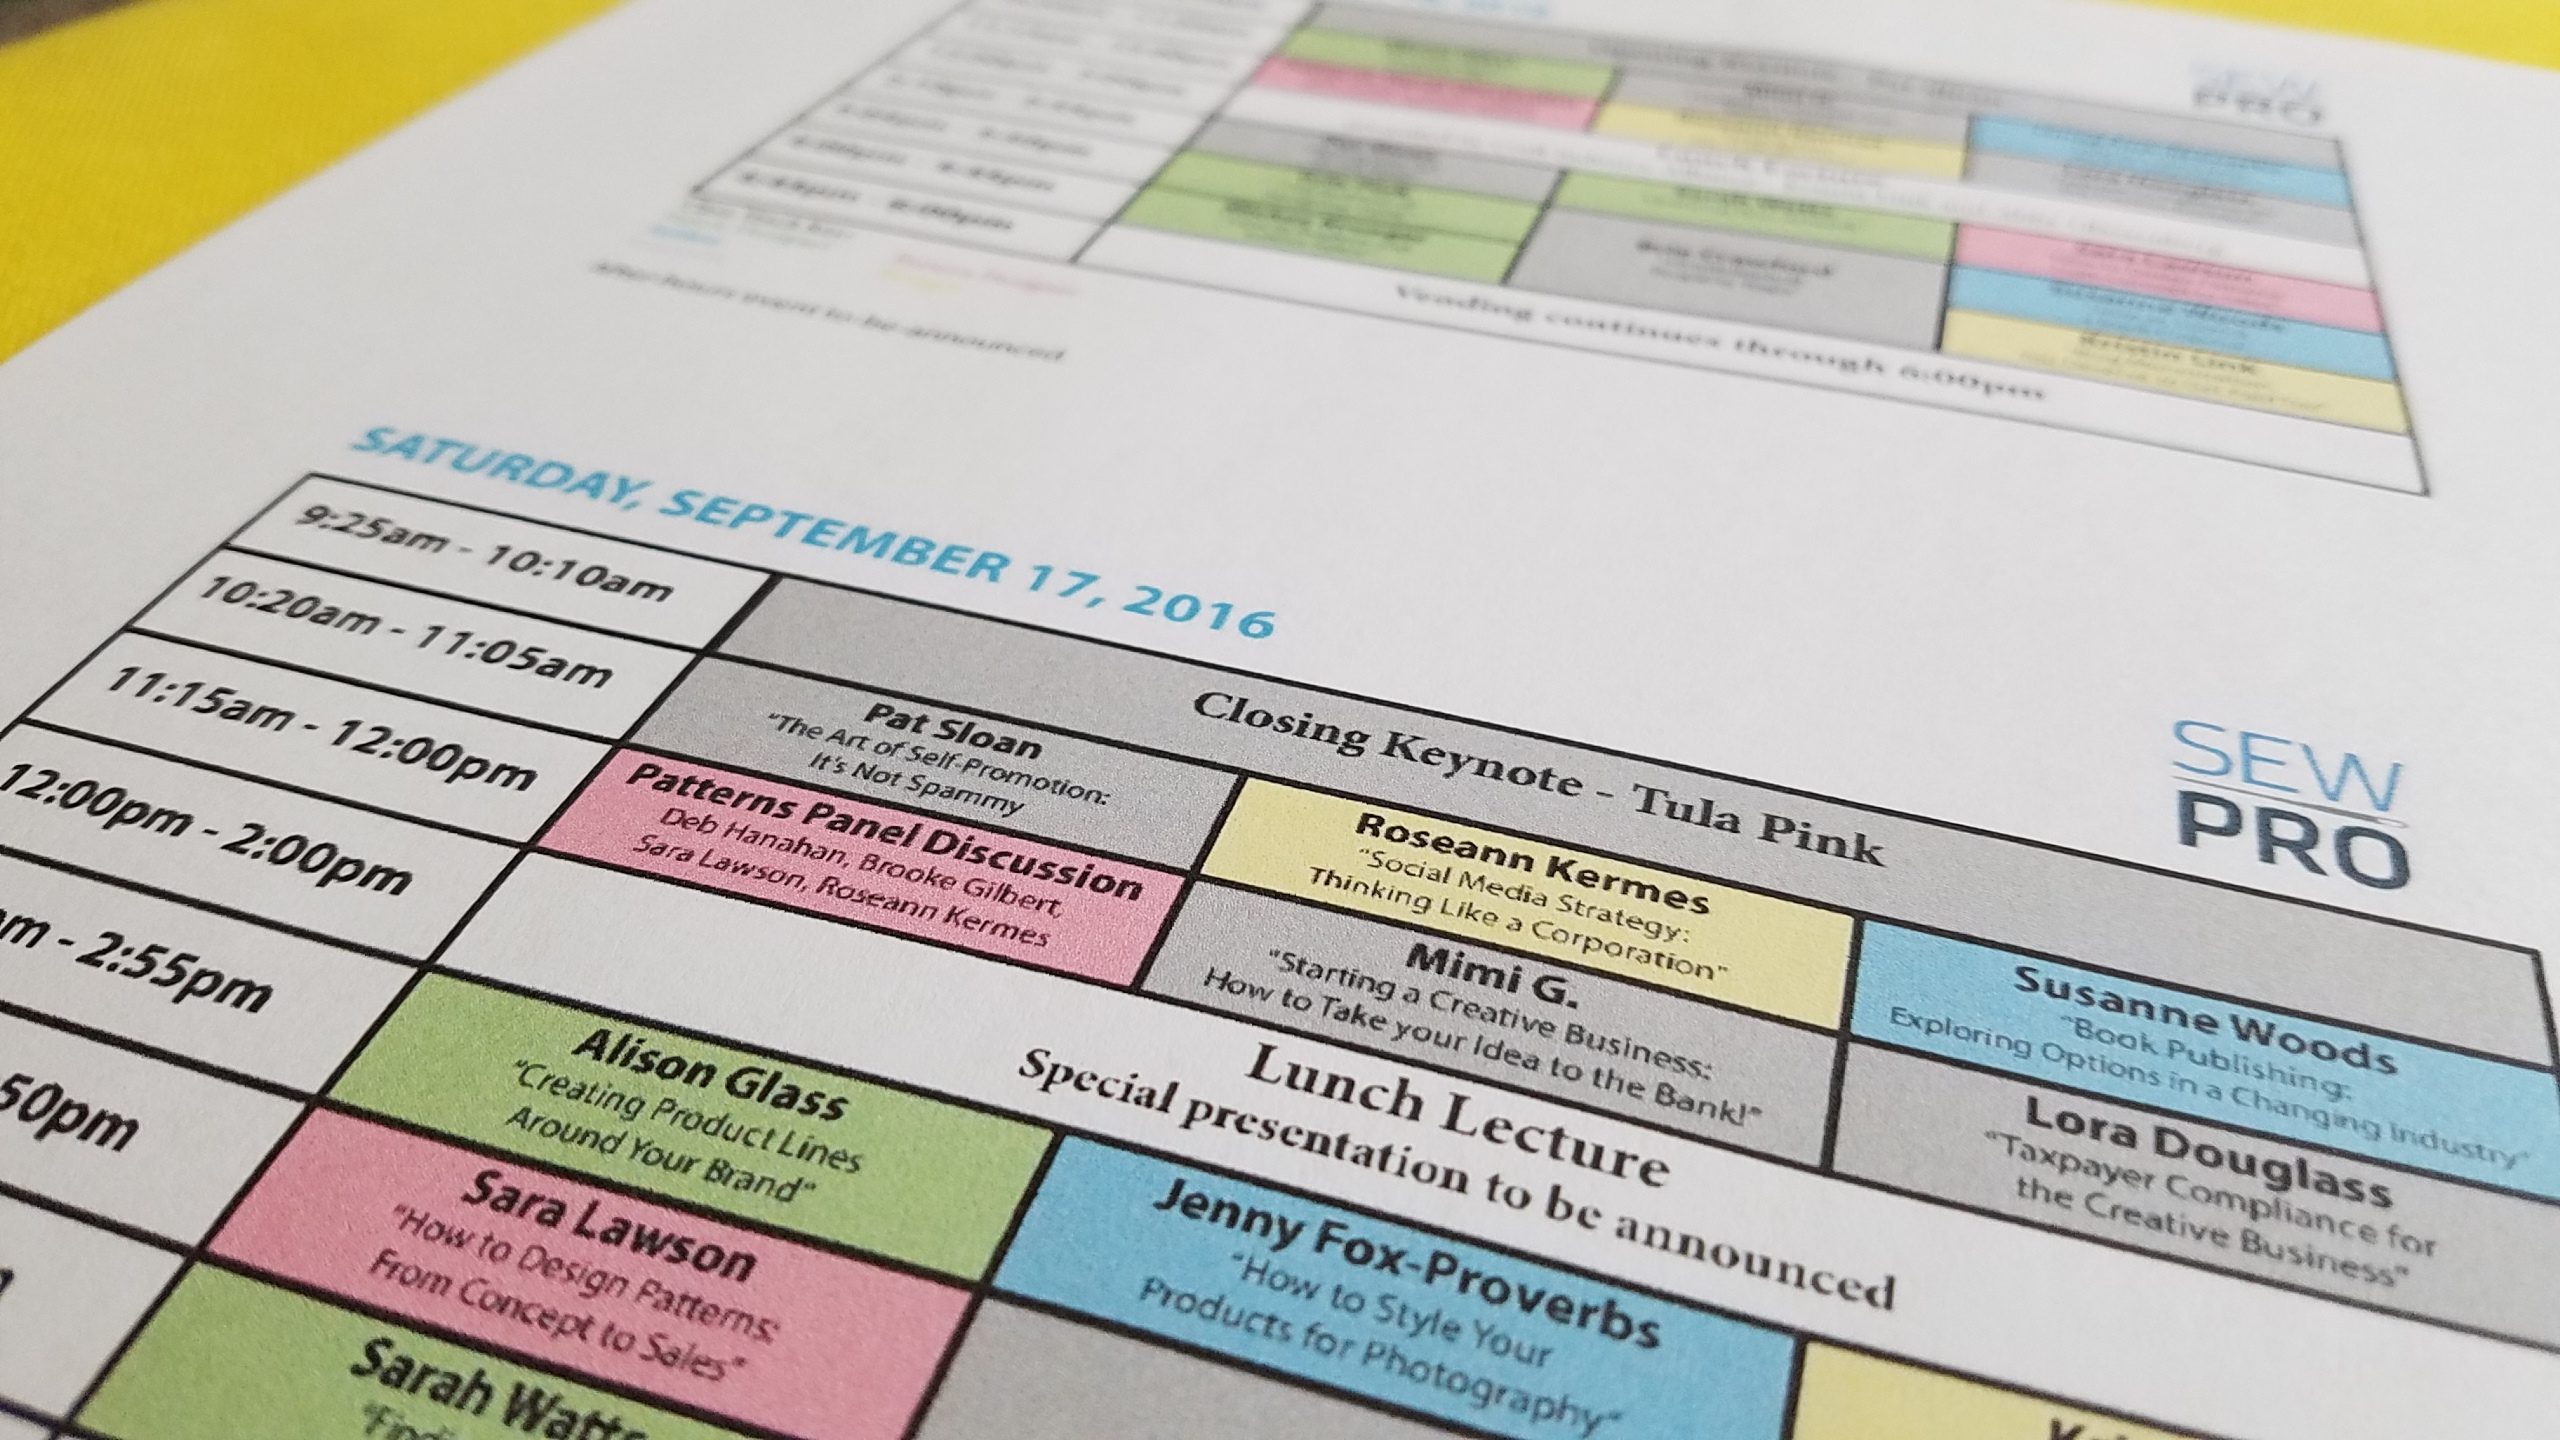
SewPro Schedule

Sew Pro Stars Blog HopWelcome to my first blog hop.

In September I was fortunate to attend in the first Sew Pro Convention in Chicago.  The experience was amazing in so many ways.  I tried to go into the event with no expectations because I wanted to absorb and learn as much as possible.  I came away having learned more than I could have imagined.


The event was organized so we had time to learn in lecture style classes followed by Q & A sessions with the instructors.  There was time to network with other soon to be and current Sew Pros and make connections for collaboration.   The mornings started with key note speakers who had so much to share with us they didn’t have enough time to fit it all in.  And they were so amazing to open up and share their experience in the sewing industry with all the tips to help us get started and keep going.

SewPro Schedule

My brain was so full of ideas and inspiration after leaving this convention…and I am working everyday to put all I learned into practice.

“Do the work”

I heard this so many times from every single instructor.  Do the work and keep doing the work and do the work again.

And this rings so true…practice, practice, practice.  Practice will only make you better at what you want to do.

I took a pattern design class taught by Sara Lawson of Sew Sweetness.  She shared information on instructions, design, layout, and printing.  It was amazing to get the information I needed to design patterns.  My takeaway from the class was that I could make my patterns so much better.  So I decided to revisit the only pattern I have released and re-work it to make it better so I can set a standard for all the patterns I plan to release.  I didn’t realize until after I released this pattern how much I really enjoyed designing, writing, and developing patterns.  I have so many pattern ideas and having an identity to make them all recognizable is important to me.

The pattern is called Ten Squared.  I developed this pattern through an experimentation with Half Square Triangles (HSTs).  Setting out to challenge myself to create an entire quilt with HSTs without any repeating blocks, I designed a dynamic graphic pattern and set out to recreate it in a quilt.

In the re-work I updated the directions for assembling the quilt and redesigned the front cover so I can use the same design for all my pattern covers. Be on the lookout…Penguin Feats are on the way!

Ten Squared made with Alison Glass fabrics

I also created this quilt top using the new instructions and some really bright Alison Glass fabrics.  The pattern is available in my Craftsy Pattern Shop and my Etsy Shop.  Download your digital copy for only $6 until Monday Nov. 21, 2016 at 8pm PST.  After that the price will be $8.

Making connections at SewPro was an important tool I didn’t realize would be possible.  It has been difficult to establish connections over the years as I have moved a lot.  So I was grateful for the opportunities given to us to network and build relationships.  I really feel connections are important because we can all use the support to help us reach our goals.  And those connections create collaboration, which only makes everything better.  Two are always better than one.  And three or more can make everything just awesome….just like this blog hop. The collaboration among us has created something bigger than one individual blog.

There are some fantastic prizes on this blog hop.  A prize package including a fabric bundle and patterns will be offered to a lucky winner on Saturday, Nov. 19th.  In order to enter for a chance to win that package follow the Rafflecopter Giveaway Link below.

Foldover WristletIn addition, I will be giving away this colorful foldover wristlet made with beautiful Alison Glass Ex Libris fabrics and cork.  In order to enter the drawing for this please follow me on Instagram @penguinfeats and tag me @penguinfeats in your favorite make on Instagram.  I want to see you “do the work”.  Please make sure your Instagram account is public so I can see the post you tag me in.  I will choose a winner from the tagged posts on Monday Nov. 21, 2016.

Please take some time to visit the other blogs on the hop.  Since I am pulling up the rear with Becca, HollyTeri, & Deanna you don’t have much time to enter the giveaway, so be sure to get your entry in before 12am on 11/19.


Monday Nov 14

Lisa and Lorelai

Rebecca Mae Designs

True Blue Quilts

Tuesday Nov 15

Vintage Barngirl

The Stitch TV Show

Powered by Quilting

Canuck Quilter

Lisa Lisa and the Quilt Jam

Wednesday Nov 16

See Carmen Sew

Hudson Valley Quilts

Desert Bloom Quilting

Sweet Little Stitches

Thursday Nov 17

Marvelous Auntie M

A Quilting Chick

LovinglyLissa

Creations by Paula

Friday Nov 18

Pretty Piney

Lighthouse Lane Designs

Day Moon Quilts

You are here >>> Penguin Feats

 Stitches Quilting


A Rafflecopter Giveaway>>>The Rafflecopter giveaway has ended!  You still have time to win the Foldover Wristlet.  Please read above for that giveaway!


Posted on 2 Comments

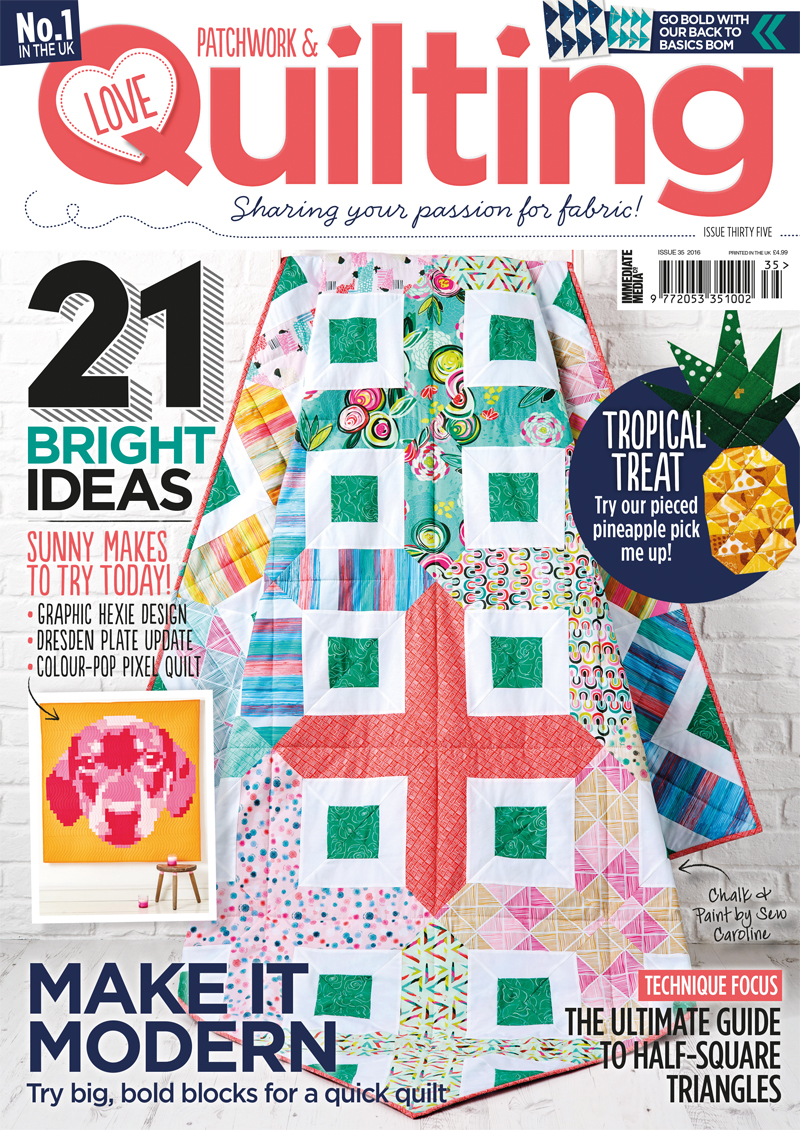
My First Quilt Magazine Cover!!

issue 35 pineapple
Love Patchwork & Quilting #35

I am so excited to present my first magazine submission….and it made the cover!!

It’s a tropical treat!!


I was trying to come up with a very small pineapple block to work into a cover for my sketchbook.  I had already worked out a pattern for a larger pineapple block (11 in x 7 in) but I wanted one that would be small enough to fit within the cover of a sketchbook.  So I reworked the pattern and stitched out a sample. Perfect.


pineapple sketchbook
Love Patchwork & Quilting


Then, I began to work on a pattern for the sketchbook cover.  I wanted something that would close with a zipper, but, wanted to use up my separating zippers.  And the quilted sketchbook jacket was born.


I was super happy with the prototype and wanted to get some exposure for the pattern.  I have a pattern on Craftsy, and while it is a great venue for selling indie designer patterns, I don’t know how to get more exposure for it and really wanted this pattern to get more exposure.  So, I went about researching magazine submissions.  I absolutely adore Love Patchwork & Quilting Magazine out of the UK.  My subscription started in 2014 and I love all the content the magazine brings.  While I wish the delivery was much quicker….good things come to those who wait, right?

I wanted to see if LP&Q would be interested in my pattern.  The email was written about 10 days before I even sent it off…as I debated whether my submission would even be seen let alone accepted.  It is a big step to take sending your ideas off to an editor and submit to the aesthetic of someone far off you have never met.  But, I took the plunge and clicked the Send Button on the email with images attached.

To my utter astonishment and delight the reply to my email was prompt and my submission accepted!  I was pinching myself for days!  Then, the real work began because I now had a deadline…a real deadline!

The deadline was met and my samples were sent off….and LP&Q worked their magic on the magazine layout!  Oh and those images are magic!!  Thank you for a great experience Love Patchwork & Quilting!!

The magazine was released May 25th, and will be available in the US in 2-4 weeks. Bookstores & Quilt Shops carry single issues, and you can get this beautiful magazine delivered to your door or your mobile device.  Visit the Love Patchwork & Quilting website to find out how!!

I have created a mod for the pattern to add a zipper pocket to the inside cover. The pocket will be perfect for holding pens & pencils while you travel with your sketchbook. Look for the post within the next week.


When you make a quilted sketchbook cover, please take a picture and tag @penguinfeats on Instagram or Penguin Feats on Facebook.


Posted on 5 Comments

Terry Potholder Tutorial & Giveaway

finished2

I developed this pattern for potholders when I couldn’t find any terry potholders that were thick enough for me to use without feeling the burn.  It seems all the potholders are cotton fabric with a thin layer of padding…and the cotton fabric doesn’t wash up as nice as the terry cotton.


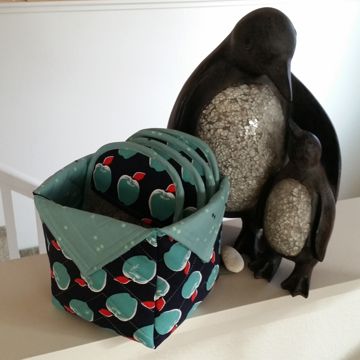
The Fabric Box for the potholders is made using this tutorial from Seaside Stitches.  I cut my fabric squares at 18 inches and stitch 4 inch corner triangles since I used a larger fabric square.  I find this size to be perfect for holding 4 potholders and a couple towels.


What you need to make 4 potholders

Potholder template [download here]

1 bath towel [I recommend a very inexpensive 100% cotton towel.  Heavy thick towels are too thick to quilt. Some towels are big enough to cut 8 potholders from.]

Cotton batting [1 layer 1oo% cotton batting the same size as your towel]

Cotton thread 40 or 50 wt.

1 Fat Quarter of fabric A for pockets

½ yard of fabric B for bias binding (or 3 yards bias binding)


Layer:

layers1


Lay the towel out flat with single layer of batting on top. Fold the towel and batting in half with the batting in the center.  If there is a non terry edge to the towel, don’t layer this part and don’t quilt this area.


pinbaste


Pin baste in place.


Quilt:

use masking tape to mark quilt lines


Using a long ruler, mark one diagonal line with painters tape.


quilttape


Using a medium stitch (about 3 mm) stitch along the tape line.

Using a seam guide, stitch lines 1 inch apart over entire towel surface.

Don’t stitch on the non-terry part of the towel.


*using a walking foot is very helpful to get even lines without puckers or folds.


mark2


Using a long ruler, mark one line perpendicular to the stitched lines with painters tape. Using a medium stitch (about 3 mm) stitch along the tape line.

Using a seam guide, stitch lines 1 inch apart over entire towel surface.


*if you want to have diamonds, mark this line at 60 degrees instead of 90 degrees.

Download and print the template. Be sure to print at actual size or the potholder base will be too small.

Cut:

tracetemplate


Mark outline of the potholder base using a thick marker.

It helps to stitch just inside the marked line to prevent stretching and unraveling of the terry cotton.

Cut the potholder base along the marked line. Don’t cut inside or outside the line, cut along the marked line.


Cut 6 inch wide strips from Fabric A.  Press in half lengthwise so you have 3 inch wide strips.

Topstitch along folded edge at ¼ inch.

Cut the strips into 5 1/4 inch lengths.

Cut 1 ¾ inch bias strips from fabric B.  I recommend the 25 mm bias tape maker for the potholders.

Join strips to make one continuous strip.  Press the seams open and trim ears.

makebias


Using bias tape maker press the bias strip.


Assemble:

Pin pockets to potholder base matching side edges and top edges keeping the folded edges straight.  Baste pockets to the potholder base with 1/8 inch seam.  Trim corners off pockets to match potholder base.

pockets


stitchbias


Beginning on straight side, stitch bias tape to potholder front using ¼ inch seam matching the raw edges of the potholder with the raw edge of the bias tape.


trimbiasends


Trim the ends of the bias binding so the overlap is the same length as the width of the bias binding.


mitrebiasends


Join the ends of the bias tape by stitching across the outside corners.


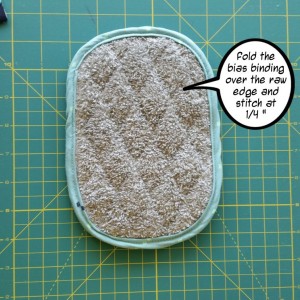
Stitch down the remaining section of bias binding using ¼ inch seam.

biasfinish


Fold bias tape over raw edge of potholder base.  Stitch bias tape down on potholder back using ¼ inch seam.


And now for the giveaway…yes…I will be giving the cute little box and potholders to one lucky Instagram follower!  If you want to have a chance to win this lovely set do just two little things…

1. Follow PenguinFeats on Instagram

2. Repost the giveaway pic on Instagram using #handswontburn and tag @penguinfeats


I will randomly select one person to send the potholder set to.  This giveaway will end 10 April 2016 at midnight HST.   Open internationally.

The giveaway has closed.  Thank you for participating! And the winner is…..

Barbara T.