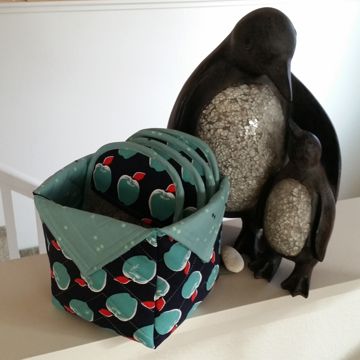

I developed this pattern for potholders when I couldn’t find any terry potholders that were thick enough for me to use without feeling the burn. It seems all the potholders are cotton fabric with a thin layer of padding…and the cotton fabric doesn’t wash up as nice as the terry cotton.
The Fabric Box for the potholders is made using this tutorial from Seaside Stitches. I cut my fabric squares at 18 inches and stitch 4 inch corner triangles since I used a larger fabric square. I find this size to be perfect for holding 4 potholders and a couple towels.
What you need to make 4 potholders
Potholder template [download here]
1 bath towel [I recommend a very inexpensive 100% cotton towel. Heavy thick towels are too thick to quilt. Some towels are big enough to cut 8 potholders from.]
Cotton batting [1 layer 1oo% cotton batting the same size as your towel]
Cotton thread 40 or 50 wt.
1 Fat Quarter of fabric A for pockets
½ yard of fabric B for bias binding (or 3 yards bias binding)
Layer:

Lay the towel out flat with single layer of batting on top. Fold the towel and batting in half with the batting in the center. If there is a non terry edge to the towel, don’t layer this part and don’t quilt this area.

Pin baste in place.
Quilt:

Using a long ruler, mark one diagonal line with painters tape.

Using a medium stitch (about 3 mm) stitch along the tape line.
Using a seam guide, stitch lines 1 inch apart over entire towel surface.
Don’t stitch on the non-terry part of the towel.
*using a walking foot is very helpful to get even lines without puckers or folds.

Using a long ruler, mark one line perpendicular to the stitched lines with painters tape. Using a medium stitch (about 3 mm) stitch along the tape line.
Using a seam guide, stitch lines 1 inch apart over entire towel surface.
*if you want to have diamonds, mark this line at 60 degrees instead of 90 degrees.
Download and print the template. Be sure to print at actual size or the potholder base will be too small.
Cut:

Mark outline of the potholder base using a thick marker.
It helps to stitch just inside the marked line to prevent stretching and unraveling of the terry cotton.
Cut the potholder base along the marked line. Don’t cut inside or outside the line, cut along the marked line.
Cut 6 inch wide strips from Fabric A. Press in half lengthwise so you have 3 inch wide strips.
Topstitch along folded edge at ¼ inch.
Cut the strips into 5 1/4 inch lengths.
Cut 1 ¾ inch bias strips from fabric B. I recommend the 25 mm bias tape maker for the potholders.
Join strips to make one continuous strip. Press the seams open and trim ears.

Using bias tape maker press the bias strip.
Assemble:
Pin pockets to potholder base matching side edges and top edges keeping the folded edges straight. Baste pockets to the potholder base with 1/8 inch seam. Trim corners off pockets to match potholder base.


Beginning on straight side, stitch bias tape to potholder front using ¼ inch seam matching the raw edges of the potholder with the raw edge of the bias tape.

Trim the ends of the bias binding so the overlap is the same length as the width of the bias binding.

Join the ends of the bias tape by stitching across the outside corners.
Stitch down the remaining section of bias binding using ¼ inch seam.

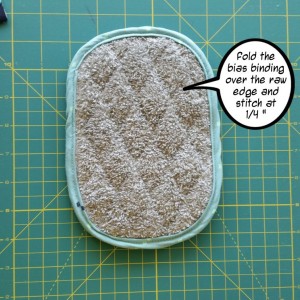
Fold bias tape over raw edge of potholder base. Stitch bias tape down on potholder back using ¼ inch seam.
And now for the giveaway…yes…I will be giving the cute little box and potholders to one lucky Instagram follower! If you want to have a chance to win this lovely set do just two little things…
1. Follow PenguinFeats on Instagram
2. Repost the giveaway pic on Instagram using #handswontburn and tag @penguinfeats
I will randomly select one person to send the potholder set to. This giveaway will end 10 April 2016 at midnight HST. Open internationally.
The giveaway has closed. Thank you for participating! And the winner is…..
Barbara T.


